Saturday, June 30, 2018

Gauge of interest

The sender is turning out to be a little less cut-and-paste than I'd hoped.  Most of it has to do with the difference in form factor, as might be expected.  Turned out that I'd actually have to cut some spot welds to get a workable solution in place, providing me with a stopping point last night because of concerns about volume and waking people up.  All that kind of stuff.

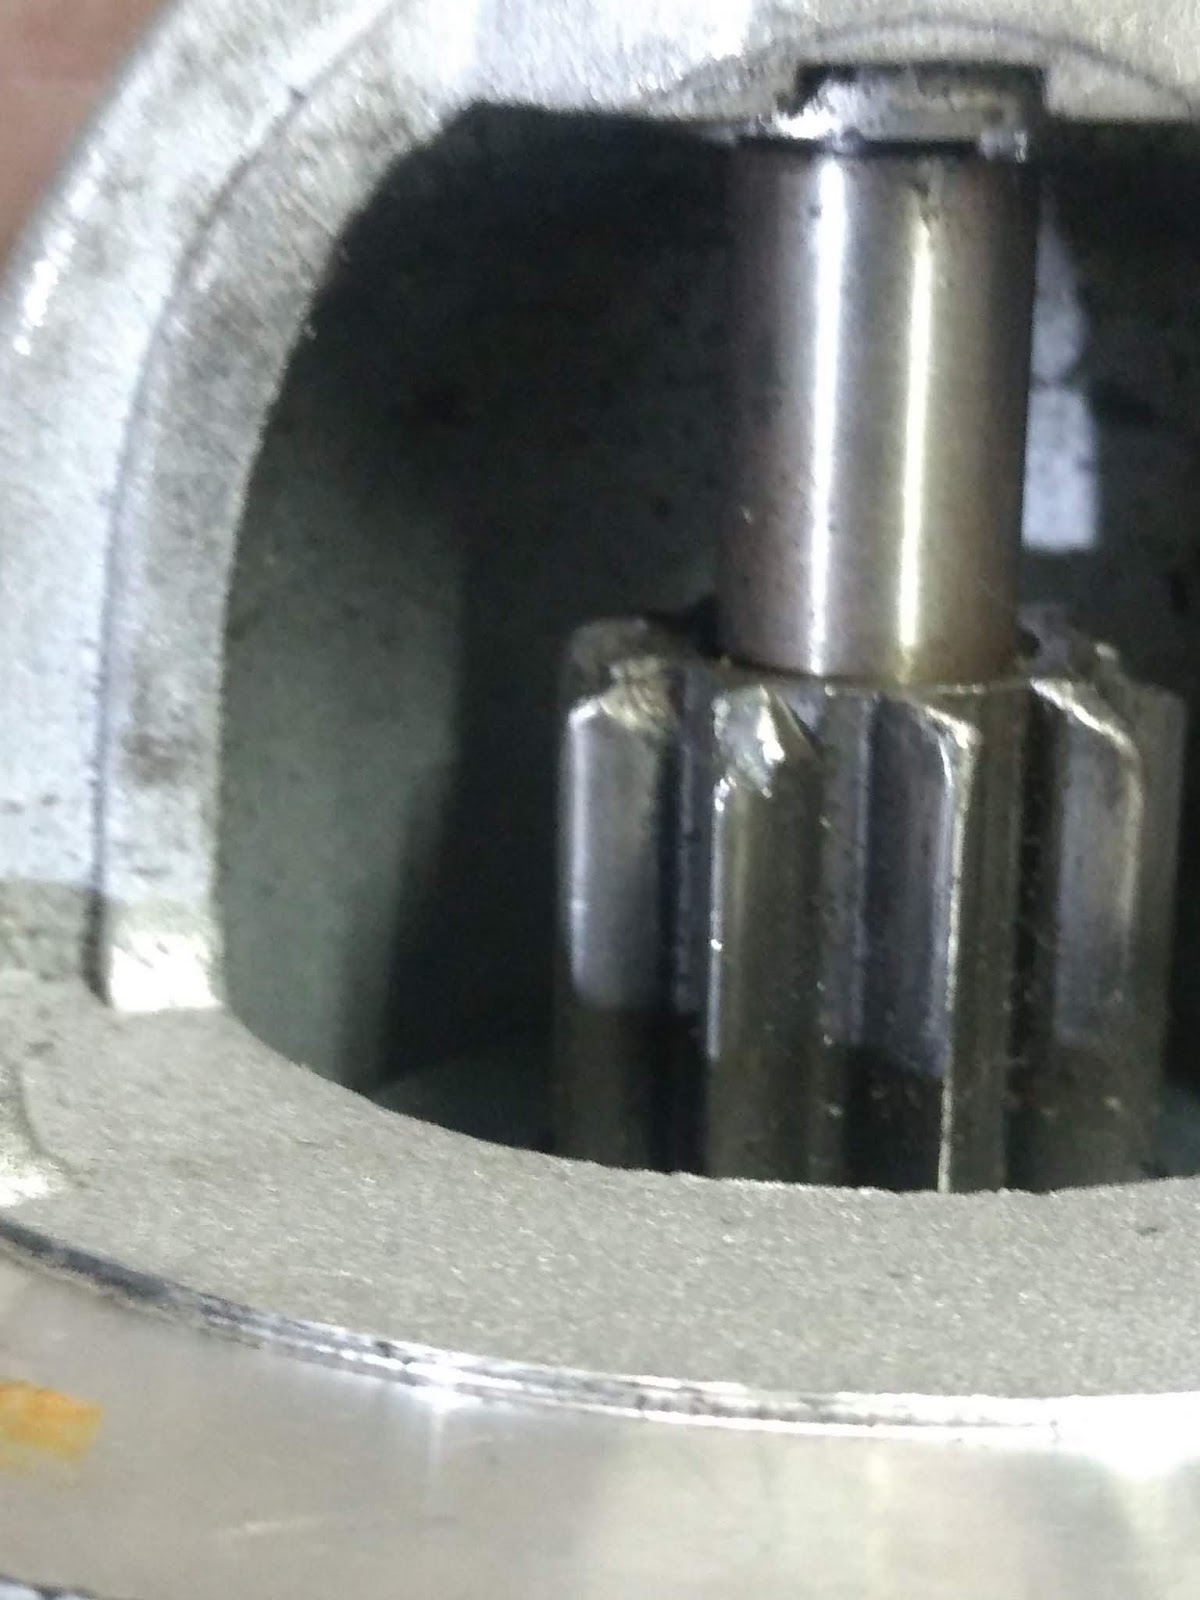
While this means I don't have the sender completed and installed, it also means I at least have a good idea of where things need to go from here.  The plan will make more sense once I've got you caught up on the other details, though.

First thing first, I wanted to check if the sweep of the new rheostat lined up with the '78 sender's sweep.  This came first because I was almost certain it wouldn't, so wanted to get that out of the way before I started trying to get smart.  As the picture below shows (left), it doesn't match with the pivot points centered.  I decided to check it against the pre-'78 sender (right), and found it was even further off.


With that confirmed, my next thought was to see whether I'd be able to trim the new resistor strip to fit the original sender's rheostat housing.  Here's a comparison of lengths.


I figured I'd have some excess I could trim, since my read of the resistor value at max resistance was a little over 270 Ohms.  I measured the strip for the desired range (between roughly 30 and 250 Ohms) and found that the winding pattern used didn't allow for me to trim off the 15/32" or so that would be needed for the board to fit without sacrificing a fair amount of resistance wire and usable gauge travel.

Left: point where R value is approximately 30 Ohms.
Right: point where R is slightly over 248 Ohms.

At that point, I had officially ruled out all easy answers.  I wasn't going to be able to effectively transplant the rheostat assembly or resistor strip into the '78 sender and the sweep was all wrong for the older sender (which wouldn't have been as easy, anyway, since I would need to further modify it to work with my '78 tank). 

As I was getting ready to shut things down for the day, I took one more look at the sweep of the new sender against my '78 unit.  I found that, by lowering the pivot point about half an inch, the sweep actually did match.  Having figured that out, the plan is to cut the backing of the rheostat housing off its mounting strip, then trim the housing on the '78 sender to accommodate the new one.  I'll have to make some adjustments to the float arm to compensate for the different pivot point, but I think it should work out alright.

That's all going to be done later, though.  Right now I need to finish this radiator and cut the exhaust down. 

Friday, June 29, 2018

Hell is other brackets

So aside from the starter, which was finished yesterday, I've been working to get this radiator situation resolved.  Brackets are finally done, and the radiator mounting straps have been appropriately trimmed.  Space availability demanded this to be done in somewhat close quarters, so I made sure to wear the appropriate PPE.


My new brackets are already drilled where needed to attach to the straps, as well as many places where it's completely unnecessary.  Next step is to drill the straps without ruining the radiator, assuming I've not done that already.  

Since I've gotten more than a little tired of working on this, I'm now moving on to getting the sender completed so I can check fuel delivery and return off the list of systems still unfinished (minus the carb, of course. We're waiting on a choke coil and a spacer/insulator plate before that's ready to go).

Exhaust is pending, though the side pipes are assembled and awaiting final fitment.  The Y pipe is slated to be pulled and cut, both because it hangs down lower than the frame rails (which could spell bad times in high-centering situations), and because the path it follows is making the routing for the left side much more difficult than it needs to be.  I won't know for sure until after the sides are mounted, but there's a distinct chance that we may still end up being able to run true dual exhaust without sacrificing time, work, or cost.  I'm hoping that this ends up being the case, if for no other reason than to allow purpose to be given to the otherwise-useless stock of 2" material I've accumulated.

Once I've pulled the Y pipe, I'll be able to finish installing the trans cooler lines.  They're actually just dangling kind of in place for now, because there's no way to get them around the Y pipe with it in place.  I'll go ahead and get them tied in and the starter reinstalled, in keeping with my policy of minimizing the number of times I have to get under and out from under the car.

I expect the work with the sender to result in a more-detailed post, since I'm going to need to figure out how to sensibly marry the different designs.  I'll save that for once it's done.  Hopefully tomorrow?


Johnald Mnemonic, part 2: Startering to Finish

Before I get into wrapping up the starter repair, I wanted to share something I thought of a little bit ago.

I was draw filing some steel stock so that I could get a 45° bevel to use for a sheet brake, when I started thinking about how keeping "bevel" and "chamfer" straight can be tricky for some folks (I know it was for me for a while).  Then I remembered a trick a friend taught me to remember "port" from "starboard" ("Port" is "left", because both words have four letters").  I wondered if there was some similar letter counting trick that I could come up with.

What I came up with was, "There are two "e"s and two faces with a bevel.".  I was kinda on the fence about how useful that was, so I just summed it up as, "Bevel is simple.  Complex chamfer."  Either or both may only make sense to me, but whatever.  I'm not a teacher.

Anyway, here's the Earth-shattering conclusion to the starter repair!

As you recall, we last left off with the starter torn apart and stuffed away in a box to await it's new drive assembly.  Here's a picture of the old and new, side by side.


Having the new drive gear right next to the old did a lot to justify spending the time and effort to replace this.  So did my inspection of the other parts of the motor, all of which
looked a-okay, minus a little bit of rust that had collected inside the case.  Note that I haven't had any concerns about the electrical integrity of the motor, so I didn't pull the meter out to verify coil values and such.  Since the drive gear was the only concern, I was satisfied with giving everything else a visual inspection.

While looking things over, I cleaned up the parts that needed it with a nylon brush (instead of one with brass or steel bristles).  This was to make sure I didn't damage any insulation or leave any conductive material/broken bristles behind, since they could cause shorts or other problems.

I wiped the dirt and a good portion of the grease from the armature shaft, so needed to get the splines slick.  The service manual says to use Dow Corning 33 silicone grease or equivalent when lubricating the armature shaft splines, though I didn't have either.  What I ended up using was STP moly EP grease, which seemed an okay "close enough'.  Between that grease being designed to stay put, and the small amount needed, I felt safe under the assumption that it won't cause the car to blow up.

Assembly was the reverse, but there were a few things I noticed:

  • The washer that fits over the retaining ring was very motivated to get away at any opportunity.  Keep an eye on it until you have the armature shaft fully seated in the bellhouse and the yoke arm pin in place.
  • Don't forget the yoke return spring, which is surprisingly well-behaved as far as springs go when assembling a thing.
  • The ground brush is a little tricky to get seated.  I'd wait to do it last, once the other brushes are seated and retained.  Just make sure to check it regularly while arranging the insulator and seating the other brushes so that you don't fray the braided conductor.


And here's our buddy, all fixed up and back together:


At this point, you'll have to decide how much you feel like gambling.  If your luck is good enough to rely on, just go ahead and get the starter back in and you're done.  If you're like me, at least in the sense that you make every effort not to waste your short supply of good fortune, then you'll probably want to test your work before going through with reinstalling the motor.

Even though I'm sure you know or could figure out a good testing procedure, I'll include mine for the sake of completeness.
  1. Forcibly restrain your starter.  I used ratchet straps to keep it from escaping.
  2. Car battery.
  3. Connect car battery positive terminal to the copper terminal tab at the rear of the case.
  4. Connect battery negative terminal to any exposed spot on the case.  The starter gets its ground from the mounting bolts to the block, so ear's a good place.
Remember at all times, but especially while testing, that no part of you is harder than ring gear teeth, and that clothing is a direct express route to injury if it meets a drive gear.  This is why I test my starter while nude, with the exception of a piece of composite armor I've fashioned from scrap metal, cardboard, and an old flexplate to guard my nether regions.  Fool me once, starter. . .

Let me brake it down. Dear god, please let me brake it down. Also, re-nerd to sender.

Nobody carries 18 gauge sheet.  I get it; you can't carry everything, so you have to pick the closest gudnuff option with some things.  It still sucks when I'm trying to bend brackets without a brake and the price is right option is 16 gauge.  That small numeric gap makes quite a difference under those circumstances.

You'll probably tell me that I should consider buying a metal brake.  Lucky for you, I have a very good reason for not having one:

I don't feel like it.

That's enough of my totally reasonable and justified complaining.  We have fuel senders to discuss!


Pictured above is the rheostat portion of part number 55818, made by the Door Man himself.  Details on the product mention that it is designed for several makes, with AMC being one.  That's pretty neat.

I find it kind of interesting that they specify the late model sender resistance range, while using a rheo housing and resistor element form factor that's the style of the older senders.  It'd be really convenient if they had used late model packaging, but I can't expect everything for $20.

The internals surprised me somewhat, since it looks as though they decided on the other design path with their wiper (vs what I described a few posts back, where the OE wiper was designed with multiple roles in mind).

My blurry-ass picture illustrates that Mr. Man opted to use multiple components to perform isolated tasks: the conductor is a simple brass piece (an uncompressed rivet, by the looks of it), and the contact tension is loaded by a spring that's fitted over it.  The wiper arm is an extension of the float arm, which sources its retaining tension from a second spring.

I wasn't expecting to see a wire-wound resistor strip when I bought the part. I had fully expected it to be a PCB design, like I had mentioned previously.  All in all, I'm not sure what to think.  I'm a little suspicious of how long-lived these little springs are going to be, especially given how senders like to rust up.

I really don't know if there's a right answer, to be honest.  Maybe a design that uses peizo elements to determine weight of the tank?  Might work if you only drove a certain speed on smooth, flat terrain.  Or put a computer to the task.  Neither idea works for me.  There are probably a number of equally viable and complicated solutions that could be implemented, but I don't think we'll beat the electric toilet model for simplicity.

Oh! How about a sight glass, LEDs, and a camera?


Thursday, June 28, 2018

What's Lincoln Thinkin'?

Aside from writing my update about the starter repair, I spent the entire day fighting the sheet metal flanges on the radiator to correct the depth offset and allow my shroud to fit.  It didn't go well.

After my sender and starter drive were delivered, I went and picked up some sheet steel to make some proper radiator mounting flanges/tabs/ears/whateverthehell.  That said, today's agenda is shown here:


Let's see how many I actually get done.

I'll be adding an update later that will include an analysis of the Dorman fuel level sender and how it compares to the original design.  There are a few interesting differences, though all the same, I think it'll work out okay.

Until then, some friendly advice from Door Man:


Wednesday, June 27, 2018

Not All Teeth Can Be Crowned: Your Guide To Starting Preventative Care, Pt. 1

Hey, who wants to rebuild a starter?  Kinda.  When I saw my drive gear was messed up, I searched around the parts haus sites in my region and found that starter parts and rebuild kits aren't something the stores keep in their inventory.

That leads me to consider the possibility that people repairing starters (vs just buying a new one) is becoming a thing of the past, so I decided to put a walk-through of my efforts to replace the drive assembly in my starter.  Maybe this can one day be useful reference for some technophobe to find on the ultranet in the dim, robot-infested hell world we forge as the days go on.

We're going to be using the info in the '78 AMC technical service manual for reference, but the info should be generally applicable to starter designs that predate gear reduction drives, whether they be the Ford-type used on many AMC vehicles, or others.

Here's the exploded diagram of the motor we're working with:


And our disassembly, inspection, and assembly instructions (I'm not going to try uniformly formatting my images on a phone, and I'm not sorry):


Note that I've omitted the steps for other service procedures that are unrelated to replacing the drive assembly.  I've also gone ahead and posted the replacement and assembly instructions, since it's a good idea to review the steps for the entire process, start-to-finish, before beginning.  This helps to head off a lot of mistakes that can be expensive in both hours and cash.

Alright, so we've preheated our oven and measured out our ingredients, so all we need now is a starter.


As you can see, I've already taken his hat off, which is retained by the single screw that's resting inside it.  Next, the through bolts are removed.


The bolt on the left actually has a rubber sleeve under all the rust.  I brushed it off and kept it fitted on the bolt shaft.  The next step is to remove the brush end plate, springs, and holder/insulator.


Note that there are slots in the brushes that the springs seat in.  Be careful when pulling the springs to make sure that you don't yank the brush out with it.  The brush coming out isn't a problem, but you don't want to chip the brush, or damage the braided conductor.

Also pay attention to the position of the recessed slot in the insulator.  That's a helpful keying reference during reassembly.

With the brushes and insulator removed, it's time to take the bellhouse off.  Mine required a couple light taps with a deadblow to the ears.  Not much; just enough for the seam where it mates with the case to spread just a bit.  After that, I took a flathead, set it in the slot in the picture below, and carefully rotated the tool to ease the bellhouse away from the case.


From there, everything comes apart pretty easily.  Make sure to watch out for the washers/bushing in the nose, shown next.


Pull the armature out and set the housing aside to inspect later.  I tested the clutch of the drive assembly as described in the manual - locked solid counter clockwise, rotated freely the other way.

To remove the drive assembly, you'll need to slip the lock ring off from the end of the armature shaft.  You'll then be left with the following parts.


Here's what my gear teeth looked like.  Surely not the worst, but I didn't want to go jamming that into my new flexplate.


The next step from here is to wait for the replacement drive assembly to be delivered at some point tomorrow.  If that happens as scheduled, I'll do a 2nd part to cover inspecting the other components and any gotchas for assembly.

Tuesday, June 26, 2018

I got a gut feelin'. . .

 I'm not sure if I'd mentioned this before or bit, but the starter aroused my suspicion the order day while I was thinking about the flexplate.  Long/short, the starter was pulled because the drive gear is chewed to hell. 


I can't tell you chicken or egg, but I can say for sure I don't want to go hungry, and I'm not replacing my new flexplate because of a messed up starter gear.  With that, I'm ordering a new drive gear because parts stores don't carry parts.

Along with that, I'm ordering a universal sender that I can pull the rheo from.  After looking around for a bit, I found that a Dorman part should do the trick (part # 55818).  Unfortunately, I've got a feeling that the tank will need to be dropped again once a couple years have passed.  Part of the housing is plastic, and I'm just not sold on it lasting for as long as I want.  The other detail is the way the rheostat is built. 

The resistor element looks to be a PCB type, kinda like cheap heating boards and such are made.  While it looks like etching a board would result in a more durable product than wrapping resistor wire around a strip of phenolic, I would expect that this approach has become the standard in part due to cost.  These boards don't cost a lot to make/have made.  Depending on how many sacrifices are made at the altar of profit maximization, the copper layer may be less long-lived than a wire-wound part.  This is all speculation, though, so we'll see what happens!

I was working on setting placement of my mufflers, which called for removing the chrome trim on the rear wheel wells and fitting the totally rad fender flares in place.  Things need a good washing and proper mounting before they'll look good enough for pictures, but I was happy with what I saw.  I was not happy with getting the damn screws off that held the trim in place, though.

I soaked the screws in penetrating oil of a few varieties over a long period of time, though none seemed to do much.  I also started trying to use a screw extractor, but the godawful Bosch drill bits I have (the only set I have with the necessary size bit) wouldn't drill more than 1/64" into the screw head before going dull.  I managed to get them free by using my spring-loaded center punch.  I just seated the business end in the center of the cross in the screw head and actuated it 6 or 7 times.  The screws didn't come out easily, but they still came out.

Finishing touches were made to the trans cooler lines, which are now ready for final install.  The necessary 3/8 line fittings were installed in the trans, too.  While getting the fittings, I also got a 1/8 tee and hex nipple for the oil pressure gauge and light senders, assembled them, and sweated the joint to prevent loosening and leaks.

I had hoped to use cardboard shipping tubes and pvc 90s for the exhaust mock-up, but neither of these items are sold anywhere around here in 2-½".  I'll be figuring that all out tomorrow, and hopefully getting started on hacking up more tubing.  First, a short nap.

Sunday, June 24, 2018

Die, a rheostat

Good god, that sender tried it's damnedest to recover.  That little guy and I got really close during it's last days, and I'm always going to try to remember the things I learned while working with it.

For instance, in my efforts to repair the wiper arm, I found myself having to try to build an entirely new arm.  The original one work hardened and then broke very quickly (it'd actually be more accurate to say that it caught on fire in spots where it was more fatigued than I thought).   Not too much of a surprise, since it's a really thin brass strip.  The part is fine for the electrical functions it's supposed to perform, but the qualities that make it a good electronic component makes it a weak mechanical component after 40 years of service have had their chance to show weak points.

Regardless, while trying to figure out what to make the replacement arm from, I thought about the roles assigned to that little brass strip.  First and foremost, it's a rheostat wiper contact.  Further, it's from the path of conductance from the contact to ground.  The mechanical aspects of the part are equally simple: act as arm for wiper contact and conductor that rotates across the span of the resistor strip, and do duties as a spring that keeps tension on the float arm and rheostat contact point.  I had a ton of different materials that would do those jobs.  Hell, sheet steel would work just fine.  Thing is, I noticed a pretty significant difference in wear of the wiper an the resistance wire when I first opened the sender pod - the wiper was a worn down nub.  The wires were pulled out of place from getting snagged, but were still in good shape as far as abrasive wear is concerned.

Thinking about it some led me to believe that the wiper was intended to be the sacrificial component, based mostly on the kind of material used.  I don't really keep brass strips on hand, at least not that thin.  After a few minutes, I pulled out an old electric choke spring and snipped off a couple inches of that.

Since it's a bimetallic strip, I checked both sides with the meter and got a resistance read of about 5 Ohms/in from one side, 0 on the other.  I wondered how far the conductive side could get worn before the metal with the higher resistance began to take over, so started hitting the resistor side with emory cloth.  I was pretty surprised to find out the resistance side was only about as thick as the enamel insulation on magnet wire.  Scrubbed it off, got 0 Ohms on both sides, as well as with my meter probes contacting opposite surfaces.

Popped a couple holes for the float arm in the strip, shaped it, rolled it over into the spring "U", and set that aside to focus on the other areas needing attention.  That brings me to the next thing I learned:


I learned that, at some point, I finally figured out how the hell to braze things.  This is an extension brazed to the pickup tube to compensate for the reach lost when the sock crumbled. Should work just fine.

I also learned that I'm going to have to buy an aftermarket sender and graft it on the original pickup.  Once the pickup was brazed, I set out to re-wind the resistor.


I think I did an alright job at wrapping wire semi-evenly, but I did a piss poor job of winding a functional electrical component.  I tested it with the meter and got a few bad values at the halfway-ish point, which was something I could deal with.  I want happy that the resistance would read as high as 219 Ohms near the 80% point, but the next and subsequent winds all read open.  Combining those details with the kinks and bends in the wire, I figured that I hadn't really improved the overall condition or longevity of the sender.

Aside from that, I finished up some brackets, and have been doing some big things in exhaust town.  We'll see more about that soon.  I also got the trans lines to damn-near levels of finished.  Just need to flare a line and they're finally, FINALLY taken care of.  I'll share some details and an interesting discovery from that after the last couple things are done.

Thursday, June 21, 2018

Concession Stand

Following nature's demand, my task-tree was blown straight to hell today.   After discovering some scheduling details I was not clear on, the exhaust work got to take immediate center stage.  I guess it's not a critical disruption, since I ran into a few things with the AC compressor mounting that was putting a damper on things, and likewise with the PS pump.

Really, though, this is just one of many temporal blisters that have been rubbed raw since winter began.  Combining today's discovery with the matter of time being a resource I had actually run out of about 6 months ago, I decided that it's in my best interest to take another approach to which type of exhaust design I'll be using.

My plan for the past couple years has been to run the exhaust as true dual, 3-1.  As much as it pains me, I've decided that I'll have to come back to this design at some point in the future when time and money permit.  Luckily, I pulled the entire Y pipe from a burrito supreme a while back, as opposed to just cutting off the collectors.

Having the whole Y from an XJ is a blessing that's been vigorously mixed, since the other exhaust pipes I've amassed are 2", and not 2-1/2".  I'm not too badly impacted by it, aside from not having any 2-1/2" elbows and having precious space taken up by exhaust pipe I can't use.  If you're wondering how I'll be plumbing the exhaust without having any usable exhaust pipe, well. . . remember that Sportabout driveshaft that got messed up?  It's 2-1/2" steel tube with the same wall thickness.  Good thing I've been working too much to throw anything away.

After figuring all this out, I pulled out the exhaust components and further abused the remaining available square feet of space in the shop, started dry fitting parts, cut the Y to a length that would let me test fit it under the car, and unboxed the sidepipes.  The pipes and heat shields in the kit are pretty good.  I have some severe disagreements with the way you're expected to mount the pipes and the associated hardware, though.

"I don't need lag screws in an exhaust kit.  This had better not be for what I think it is. . ."

"Nope.  Not a chance in hell."

I'm not quite sure what I'm going to do to hang these yet, but I'm thinking something like the hanger that the Y has/had, since it makes a lot more sense than PUTTING LAG SCREWS THROUGH MY GODDAMNED FLOOR.  Also because I have a ton of leftover polyurethane bushings that would work pretty well for that purpose.

I'm sure the screws would do a fine job of keeping the pipes attached to the car, but I have two really big problems with this: for one, I'd feel really stupid putting time and effort into intentionally sticking giant, sharp screws up through my floor.  More importantly, I don't want to travel back in time to floor pan repair (or even worse, rocker panels) because someone, somewhere decided rust isn't a big deal. 

My pickiness aside, I want to clarify that the kit would probably end up working just fine for 99% of people, but it doesn't satisfy how much of a particular person I am about some (a lot) of things.  I thought it necessary to give that disclaimer, just in case anyone does something foolish and decide to base any of their decisions on what I have to say.


Wednesday, June 20, 2018

Measure none, cut and reassemble twice

Guess I forgot to click "publish" for this update last night, so this is a little late.

If asked before I started all this what I expect the most filthy part of the car would be, I probably would've guessed something like the transmission or the engine.  I'm fairly confident, though, that I would not have guessed "AC/alternator mounting bracket".

Ranking the parts mentioned by relative degree of surface coverage, in combination with depth of filth layer and difficulty involved in removing it, the bracket is the new heavyweight champion of never having been touched with anything resembling a cleaning tool.  The transmission comes in at a distant second, while the engine wins the title of "contestant".

Nevertheless, I was able to peel away it's oil/tar/dirt/sand composite shell, though it required thoroughly perforating that layer with a punch tool and soaking it for a few weeks in this non-evaporating melange of degreasing products, solvent, and used oil bucket I've had outside for about 9 months.  It's presently sitting in another degreaser bath, and I'll be giving it the final scrub once I finish this smoke.

The reason for my cleaning that right now comes from the point that I got the plug wires all finished up earlier.  Even though they were all assembled and loosely tied in, the meter I have at the shop would give a resistance read for any of them.  I found this out after getting finished with the first cylinder wire, so made a note to continue on with making them, try again once done, and get the house meter to verify in the event they all read open before I start having a conniption fit.  They did, I shrugged, and that was that.

After I arrived today and rechecked with the backup meter, I was glad to see that I was getting better results.  Unfortunately, I had to re-crimp 4 of the 7 wires because they were out of my meter's range.  Still, it wasn't a big deal, and I'm glad I did it right away.  If I had put it off and forgotten about it, I'm pretty sure it would've put a damper on the first engine run.  I also made sure to record their values for future maintenance and troubleshooting reference.


Tuesday, June 19, 2018

Mission: Ignition

Started out today with a good amount of motivation and high hopes for shit getting done!  That was my first mistake.

The next mistake was deciding to start with figuring out what kind of brackets I need to make for getting the TFI coil and HEI ignition module mounted.  Despite periodic reminders that I am front-runner to win "World's Most Disappointing Bracketeer", I never quite seem to retain the lesson.  It doesn't help that I lent out some welding supplies that I would need, and even though they're less than 9mi from the house, that totals an hour and a half both ways.  And that's just in-vehicle time, thanks to how wonderful a city to live in Seattle has become. 

It didn't take me too long to figure out something else that I could do to further corrode my mental state.  I settled on cutting and crimping spark plug wires with a razor blade and the only crimpers I could find that were even close to the terminal type (which of course, is a garbage pair of wire strippers with in-handle crimping "dies" that I should have thrown away years ago).  It was pretty fun.


While it might like a data closet now, it'll be much better maintained once I do my actual loom work and get stuff tucked away.  I'll be doing that later down the line, when I give the distributor a good tear down and sprucing up.  It's a little grungy looking, so before I dropped it in I checked out how well the shaft is spinning.  It's not awful, but it takes a bit more push than I feel it should, and it only spins free for about half a turn.

I decided to stick with the Ford distributor in the picture, even though I have a brand new aftermarket HEI piece that I got a while back.  I'm not blown away by the quality of electronic components in the HEI distributors I bought, both the one in Eagle and the one I opened up today that was going to be used in the Gremlin (I needed to verify what size of capacitor hangs from terminal B to ground.  In case anyone else is searching for this info, my 4-pin HEI module capacitor has a value of .33uF).

Speaking of HEI trivia: while I was looking for the capacitance value online and continually coming up empty handed, I came across this page that has far more information about HEI modules than I've seen anyone detail.  The author of the page seems to be some sort of HEI monk that has devoted themselves to pursuing enlightenment on the true nature of The Module.  Check it out:

    http://gpzweb.s3-website-us-east-1.amazonaws.com/Ignition/HeiModules/HeiModules.html

Lastly, I also made a breakthrough in the fuel sender circus.  I should now be able to re-wind the rheo while using the original wire.  Let's see if it actually works when I put it back together!

Monday, June 18, 2018

. . . Aaaaaaand the rest

Been busy the past several hours.  Check the progress report!


The distributor wrench was a huge help in getting the two side bolts of the upper three bellhouse fasteners torqued.  They weren't a silver bullet, though; I had to torque them by feel.  Since the socket adapter and angles of the wrench bends required a lot of bracing and additional force to be applied to the wrench, my torque wrench would slip off before it could give me my satisfaction click.  Not a big deal, though - they should be pretty damn close, and I could reach the other three bellhouse bolts to click as much as I could ever want.

All in all, I'm really glad that I ended up getting the distributor wrench, since I wouldn't have been able to tighten those bolts much without it.  I'll be amazed if I ever use it on a distributor clamp bolt, though.

The order of tasks is just like it's mapped out in that tree, though I got the throttle pressure cable done while I was in crossmember country.  I repeatedly made a huge mess with the loctite while bolting the TC to the flexplate, which is how I know I was using it right.  The starter was also a pain to install, as usual.

What was a little unusual was the condition of the starter drive gear.


I'm not sure what to make of that at the moment.  While this starter probably has less than 100mi on it, I was not the one who installed it.  This was replaced back in the dark prehistory of this project, as a part of working on the electrical problems that were starting to become more frequent (starter prior to this one suddenly wouldn't engage, despite having all the electrons it could want.), so I have no way to know what relation, if any, this has with the damage seen in the old flexplate. 

If I would have thought about it more, I would have held off on installing the starter.  I'll pull it and give it a session on the test bench before first start, but I'm not going to interrupt my work flow to attend to it right now.  If I keep things moving at this rate, I may actually have this thing on the road before I have expected for a while now

Sunday, June 17, 2018

Brief check-in, dumb title, contest winners announced.

For those who tuned in last time, The gauge of my sender unit resistance wire is (close as my calipers can measure) 40awg.  It read out as being 0.0030" dia.

The wire on the sender for older models was actually larger than I thought at 0.0071" dia, or 33awg.

I feel like I may have lost two games here.  The first, of course, is the "guess your weight" challenge of eyeballing the gauge sizes, while the other is "find the material".  I'm hoping it's not too difficult to track down 40awg resistance wire.  We'll see. . .

Dental plans

Oh, fuel sender. . . What are we gonna do with you?  You crack under the slightest pressure.  Fall to pieces, even!  It's obvious that you've been worn down over time, and I can clearly see that you're all wiped out.


Don't get me wrong, sender - I'll be the first to say you need to relax and unwind, but not in the way you've decided to.


I'm not mad at you, sender, but you need to get it together.  Otherwise, I'll just THROW YOU IN THE DAMN TRASH.

Now, back to reality.  I think we all see what is going on with my most-recent discovery (for the fuel system, at least), so I'll cut to the chase.  In this case, the chase was my extra sender from earlier years that is, unfortunately, not a correct replacement.  Once I popped it open, I found that the resistor wire was in excellent shape, so I unwound a foot of it and found that. . .

The older senders not only used a different sweep range and a longer segment of wrapped wire.  They also used wire a couple gauges larger or so (haven't had a chance to get the calipers a new battery to eat).  Larger wire surface area also brings, of course, lower resistance.  In this case, the old sender resistor wire measured out to be 10 ohms/ft.  My fairly rough measurement and estimate of my original wire was 30 ohms/ft, which is somewhat supported by it looking to be around 36awg.  Swing and a miss.

I'll get accurate measures of the gauge of each after I resurrect my calipers, so we'll see how good I am at gauging wire by eye when my next update is posted.

After coming to terms with the fact that I have another unexpected challenge that rudely invited itself to stay, I changed gears and started working on what would have the most positive effect towards getting back on the road.  At the time, this was determined to be, 1) checking the evap and seeing if a new one would be needed, and 2) finish the sidelined heater box rebuild.  Those may not seem important, but I have to do that to do the exhaust.  See. . .


  • Need to hang sidepipes in place for exhaust to be plumbed.
  • Doors and fenders should be on to ensure the sidepipes are placed properly, 
  • Dash reinstallation should be done before doors are back on.
  • Hot and cold boxes need to be installed for dash to go in.
I later determined a more productive direction of effort, but I'll spare you the excitement of reading about that for now.  Know this, though: evap somehow escaped injury in the War of the Hoist (when the York compressor tried to kill me and the AC lines were yanked around like shark snacks) and shows no sign of leaks!  That's saving me a fair amount of time and money, both of which are more critical resources than usual lately.

The "unfortunately. . ." that you probably expect at this point is that the damn AC line nuts are corroded to bejeezus, and I may not be able to break them free without totally chewing the evap to hell.  I mean, look at this (note: this may look a little off because I cut the hard line length of the pressure hose to make this more manageable).  I don't think I've ever seen a nut so thoroughly caved-in.


Long/short, I tried all tools at my disposal except the torch and got nothing.  After nearly ruining the evap twice (still no leaks, though!), I decided to cash in my chips and save the next game for later.  I couldn't quite bring myself to doing the heater box, partly because some supplies I need are at the house, and partly because I don't want to sit around gluing foam and setting rivets.

Instead, I got the radiator in a safer place than it has been by test seating it in the engine bay.  Since it's an aftermarket Jeep radiator that will need some spacers, and I'm going to be using a different AC condenser from the stock part, I had a number of measurements to take and blank stares to make.  When the dust settled, I discovered I found the key to actually getting shit done.  I mean, for real.  I'm sick of writing,  so more on that in the next update.  Until then, remember to brush your teeth.  NOW.


Friday, June 15, 2018

It's not if you win, it's when wins will blow

I may have left y'all hanging on the matters related to the rear suspension because of my updates being posted to my thread on the AMC forum not making their way here.  I don't like to half-ass things or repeat myself, so I wasn't okay with the idea of just copy and pasting things.  In the interest of making sure I share this info as widely as possible, I figure that I may need to make a slight concession and do a little copy/paste.

To sum it up, my rear suspension was all out of whack because I was of the understanding that my leafs were direct replacements, but they were actually the HD packs.  The information that allowed me to crack the case can be found in a post towards the bottom of page two of this thread:

http://theamcforum.com/forum/topic94351.html

See, the vendor I purchased the springs from didn't explicitly describe the leafs as heavy duty, though they did list the SRI number that corresponds with the HD specs (67-521).  I can't say that information would've been a whole lot of help, though, since I can't justify the cost of SRI membership to verify spring details (also, I was totally ignorant to the organization's existence until the post in the thread I linked).

In the end, it turns out that the 8-3/4" arch that I've been understanding as the stock arch depth is what was used for HD springs,  but the stock arch is actually 1/2" less, so 8-1/4".  This is fine by me, since I actually get a little bit of lift in the rear to compensate for the weight that will be loaded in the rear while I do the Planet Caravan bit.  

Aside from getting this nightmare sorted out, I got the brake lines replaced in the rear, followed by the wheel cylinders on both sides.  The driver's side cylinder refused to let me crack its bleeder. I mean, seriously.  Check it out:


That's a shot of it after I pulled it from the wheel, but the damage to the bleeder was all done under the vehicle by yours truly.  It was obscene.  

Since I have a bad habit of avoiding asymmetrical parts changes, I was compelled to change the passenger cylinder as well.  Looks like I made the right choice.


I mean, it probably could've been cleaned and put back in service, but one of the pistons was sticking because of wear and scoring, and I didn't want to have to go back in and replace it after the fact.

Unfortunately, I will have to go back in at some point, since the cylinder links are corroded to dick.


It looks a lot better in the picture than it does in real life.  It cut me.  Seriously.  It rent flesh.  

Since cylinder links are a part that the parts haus deems unnecessary to stock (or sell for a reasonable price), the plan was to hit the yard and grab some links from a Cherokee / Grande with 10" drum brakes.  This turned out to be a tall order, since most of the fattys were disc (which I expected) and the XJs all had 9" drums (which I didn't), barring one.  I pulled the links from it, though they weren't much better than the ones in the Gremlin and got tossed.  Replacement of these is listed as a pending work item.

Fuel lines are sorted out, but still need some retaining clamps to be secured to the frame/body.  While I was prepping the tank for installation, I found that the sender pickup tube screen was cracking apart while I was handling it.  I attempted to pull the sock off of the pickup tube, which resulted in this:

"All that I touch seems to break in my hands. . ."

I'm not too proud to admit I was kinda bummed about this for a minute.  After spending a little bit of time trying to source a stand-in or a hacked-together replacement, I decided to say to hell with it and leave the pickup wide open.  

Normally, I wouldn't advise doing something like this; it can be an invitation for clogs, chewed up pump diaphragms, and so on.  Thing is, my other options present the same risk if they don't work out, and I don't feel like dropping that damn tank and trying to do a field repair on that kind of mess.  Since I had already decided to include a pre-pump filter in the fuel circuit, I decided that any risk posed will be minimal if I prepare by keeping an extra pre-filter or two on hand.

All things considered, we're moving forward at a good clip.  Now, I need to listen to Defenders of the Faith to get this damn song out that the leaf springs have stuck in my head.

Monday, June 4, 2018

In observance

Killdozer Day (or St. Marvin's Day, depending on who you ask) marks the day 14 years ago when a man (Marvin Heemeyer), who was owner of a muffler shop and a welder by trade, created an incredible piece of backyard engineering in an effort to create a tool to enact vengeance on what he perceived as otherwise unassailable enemies that had wronged him and taken his livelihood.

Even after all this time, there is a fair degree of controversy surrounding the man's actions and motivation.  Some believe he was throwing a dramatic fit born out of greed after not reaching an agreement for a renegotiated price for his land, while others see him as a vengeful martyr who is something along the lines of a contemporary folk hero who literally fought City Hall. 

While I'm not particularly interested in discussion these points (you can find more than enough of people's opinions one way or the other on what remains of the internet), I can't help but feel a sense of understanding towards someone who holes themselves up in a garage to feverishly work to bring life to a machine that, in many people's opinion, should not exist.

All joking aside, the machine this guy managed to make was an unbelievable piece of work.  I mean, the guy made fairly effective composite armor from basic materials.  I really wish that more publicly-available documentation about the construction and systems that were designed for this was available.  Not because I have any desire or benefit to gain by replicating it, but for the same reason I love seeing machines and tools that were developed by farmers.

So for all you cats that are getting paid to read this, let me make it crystal clear: I'm not personally or publicly advocating for the actions of the guy that built the Killdozer.  I am, however, beyond intrigued by the dude's ability to design and fabricate such a bizarre vehicle.

Unfortunately, barring the release of any unpublished documents that might exist, we will never know more about the Killdozer that Marvin built.  In an effort to prevent people from idolizing the man, authorities destroyed the machine and sent the wreckage away to many different disposal sites. 

In observance of the anniversary of a day that led the world to discover birth and death of an incredibly strange machine, I'm in the shop, listening to Killdozer's discography, and getting injured by extremely corroded wheel cylinder links.

Sunday, June 3, 2018

A thing y'all should do and an upcoming science project

Rear suspension looks pretty dang good right now.  My slip yoke stick-out is 5/8", which isn't too bad when you account for the additional 1/8" in driveshaft length; OE specs are 3/4" to 1".  I'd like it to come out a touch more, but suspect that will happen once the trans mount and crossmember are torqued to spec.

Eagle's power steering needs a little bit of love, but should be easily taken care of by doing a fluid flush (pretty sure ps sauce shouldn't be black.  Equally confident that it's contamination from the rotted return hose that's caused it).

Now, for the part where I tell you what to do.  It's not difficult, expensive, or time-consuming, but it'll totally change your life under your car (possibly more, if you're some kind of strange person that spends time anywhere else).  Here's your new mandatory maintenance activity:

Stick magnets everywhere.

That's it.  I've got a few neodymium magnets scattered over Gremlin's unders - diff cover, oil pan, floor panel, and a number of other places I forget.  Just make sure you don't put them near traveling or moving parts, so that they don't end up where you don't want them.

I'll be upfront and say that you probably aren't going to see any hp gained, but I'll gladly lie about it if it makes you try it.  Instead, it'll help minimize repeated occurrences of doing the two things that consume 90% of the time taken when doing any work under the car: getting out from under the car, and getting back under the car.

That wrench you left well out of reach when you were doing the traveling worm from the diff to the trans?  Now you can get it by sticking your handy magnet to whatever's actually near you and you've immediately gained the power of that jerk scientist from the Fantastic Four.  To maximize utility, always keep a breaker bar or absurdly-long extension somewhere under the car.  Hell, do what I do and just throw them both under there before you go spelunking, especially if you think there's no way you'd need either of them.

The mention of jerk scientists brings me to our next subject: trim and interior repair.

There are a few products that seem to be pretty effective in doing repairs with a wide range of types of plastic, and the kind I'm specifically interested in are two-part agents that cure as a plastic.  They're generally named something that's a portmanteau of "plastic" and "fix" or "repair" or whatever, and come with a "molding bar" that allows you to make a press mold of a part to cast a reproduction (think grille tabs and the like).

I looked at the MSDS sheet for one of these products and found the following for the solvent part:

   Ethylene glycol dimethacrylate - 0.0-20.0%
   Methyl methacrylate monomer 60-100%

The powder was a little more hush hush.  The really interesting part was the 0.5-1.5% benzoyl peroxide, but the rest was secret sauce and residual monomers.  I reckon that the top secret parts are likely ABS and glass powder.

Long/short, I figure I can probably make something pretty damn close with stuff I have lying around.  The molding material seems to just be a run-of-the-mill thermoplastic, and since I'm not trying to do a full copy of the product, the solvent half can be done with MEK/acetone in whatever proportion I feel like with some ABS powder sprinkled in to taste.  I don't have glass powder, but I do have plenty of ABS that I can turn into powder.

Milling the ABS portion is kind of interesting, since this plastic has a low enough glass transition point to make abrasion or household grinding methods unusable.  You pretty much will just end up with gobs of semi-melted plastic instead of powder.  What I found you can do, is to dissolve ABS in an equal weight of acetone, then slowly disperse the solution in boiling water.  The acetone will immediately vaporize, leaving ABS particulate suspended in the water.  After drying, the resulting powder can be as fine as baking flour, which I can then mix with whatever reinforcing agent I have available.

I'm not sure if this will work out the way I expect, but I'll let you know once I get there.

Saturday, June 2, 2018

Settle down. No need to get bent out of shape; we'll torque it out later.

Time and again I've made mention and provided coverage of my ongoing war with my rear suspension.  If I assess the situation honestly, I'd have to say that this fight has been the biggest consumer of time, patience, and thought, while also racking up the highest wasted-dollar amount over any other of Gremlin's systems that I've worked on over the past 10 months or so.

The lastest go-round has actually been a continuation of prior conflicts, rather than a new engagement, but what had been left as "let some weight sit on the springs and come back to it later" became a problem that needed to be dealt with sooner than later when I noticed that the new springs were experiencing shackle inversion.  I wasn't okay with letting the leafs settle in on their own because of the risk that they'd bend inwards, instead of laying flat.

After several attempts to pop the shackles out in the right direction, I decided I had two options: temporarily remove a leaf from these 4-leaf packs so that things could flex and break in more easily, or temporpermanarily use the dreaded AutoZone lift shackles to sort things out.

While I'm not keen on the potential effects on my overall suspension geometry and my diff's pinion angle, I'd much rather swap out shackles after a bit than have two sessions of dis/reassembling my leaf packs.

I'm currently having a smoke break while writing this, and haven't yet torqued all the fasteners down.  Even loosely assembled, there's been some significant change from the 1-3/4" that has been added to the shackle center-to-center space.  Both rear shocks actually fit, for one.   Correct direction of the shackle rotation is another good change.  My rear wheels appear to be resting the correct distance from the front, and it looks like I'll be in the neighborhood of an acceptable stick-out length for my slip yoke.  These are all changes I'm more than happy to see, but there are also some less pleasant developments. . . Thankfully, not many.

Presently, the pinion angle is sitting at a 1° negative angle, in contrast to the 1-3° positive angle it should have.  This can be corrected, but I really don't want to have to buy and install shims for something that should be a temporary condition.

Then there's the matter of this. . .


I obviously don't have a problem with broadcasting to the world the fact that I have no idea what I'm doing, but I don't want to do it while I'm driving.

Oh well.  Here's hoping that my victories are strengthened and my setbacks diminished once I get things torqued down.  Back to the front!

Friday, June 1, 2018

Get ready for hydrauloholics anonymous. In the meantime, cut the cable and leaf the bad lines to me.

I bought a replacement flex line for the rear end a whole back, knowing it wasn't a direct fit (despite what every parts seller says).  I figured it would be better to get it switched over to a new part that is much cheaper and easier to source than the actual replacement, even though it would require reshaping or replacing the rear hardlines.

Turns out it wasn't about a bad idea, since the rear passenger line had been bent to bejeezus by someone in days past (making u-bolt removal/installation a real pain in the ass).  I decided to take that as an invitation to toss some new lines on and got a couple lengths of 3/16" rhino hide from O'Partsy's. 

Now, bending lines is bending lines - I suspect that the people who enjoy doing it have some kind of mental disorder that should be addressed if they go around promoting their strange preferences.  I have to say that this smaller diameter tubing was much less of an aggravation to deal with.  Even after munching up one of the lines and having to make another supply run, I was able to get the new lines shaped and installed in a couple hours.

What hasn't been simple, though, is getting the rear end in order.  I've reached the point where I've traced all the problems that remain to the spring shackles inverting.  My friend and I spent a while trying to pop them into the proper orientation last night, but that went nowhere.  I just got done pulling a leaf pack and (re-re-)re-measuring it, and confirmed that the lengths and arch are correct.  I'm going to try reinstalling them tomorrow (again) to see if I can get different results from the same actions. 

The good news is that the parking brake cable was replaced with next to no trouble, minus the return spring stretching out because of how corroded and worn it had become.  The really good news is that I finally found a practical and cheap means of bleeding brakes that doesn't require bothering someone else.  I'll be writing that up as a how-to to accompany my power steering setup for a hydraulic theme week (or days. Or day.)  that will be getting posted here in the near or far future.