A lot has been going on recently, and most of it hasn't been tail chasing. Figured out the cause of Eagle's problems (brakes, obscured by intermittent behavior and other needed maintenance items that were compounding the problem), though I've still yet to correct it. It's driving and stopping, so I've been keeping going.
I gutted the AC system from Gremlin as a result of discovering it had leaked all it's refrigerant away, as well as that it had at some point been converted to R134a, and that I was tired of it trying to kill me. The last time that I pulled the engine, the condenser was damaged in a number of places and the hard lines to the evap were bent. I figured those were plenty of excuses to delete the million pound York and keep the bay clear while I focus on getting this thing running.
You'd be wrong think I'm not going to have AC, despite not presently having all the parts to make it happen. I've come up with what I think will be a pretty good solution that will give me a system with a smaller footprint in the engine bay, as well as being cheap to set up and maintain. The compressor I'm basing the design around is from a '95-99 Dodge/Plymouth Neon. I'll get into detail about why in a future update.
Unfortunately, climate control components were not all that had been claimed by the previously-mentioned garage disaster. During one of the several moments where the AC system grabbed hold of the moving engine, Gremlin decided to make it clear that the power steering solution that was in place was not to it's liking and beat the hell out of the reservoir with a hood stud. Just to make sure that there would be no chance for recovery, it also broke the aluminum cradle for the pump assembly.
As a result, I decided to switch to a Type II pump. I had initially moved to use the pump from a Grand Cherokee, but this was complicated due to my v-belt setup and need to be a cheap ass. I found a solution, but it's not a simple yard grab, so I'll be providing a full run down of parts and such once that's finished.
We've also got the engine back in, flexplate and reinforcement ring installed, trans bolted up, rear suspension mostly in place (again) and I'm now going inside because I'm done smoking. Time to install the driveshaft and make sure this damned axle is properly positioned, once and for all.
Friday, May 25, 2018
Wednesday, May 16, 2018
Congratulations! Amazon.com User! Photobucket is run by scumbags!
Just a quick fart in the canyon here:
If you're like me, over the past several months you've been getting repeatedly kicked in the bad times when searching for just about any kind of community-created documentation online. I'm not taking about Google's search engine going to complete shit in service of "we only return what index entries we can monetize, while also ignoring our own search modifiers in order to serve ads and nebulously-related e-commerce sites," no. For now, you can still manage to get some relevant info by spending 5x as much time and effort to cut through the crap you're given as a reward for your carefully crafted search string.
What I'm talking about are the fuckheads at Photobucket who weren't satisfied by making it incredibly difficult to use 3/4 of the tutorials that people spent a ton of time and effort on to document information that was nearly impossible to reference through other means. Once they realized they weren't wringing the cash out of members that they had hoped to, the upped their game by guaranteeing that a visit to their site is just a temporary stop on your way to your browser session being hijacked to alert you that your tab is now useless, but you and a thousand other people won a Samsung iGift Amazon phone card.
Photobucket, please accept these words that I have pulled up for you, from the deepest places in my heart, "Fuck yourselves to death."
Libraries be burnin' and not a mallow or a fiddle to be had.
Tuesday, May 15, 2018
Floor wax or dessert topping? Update or rerun?
I'll go ahead and deal with the familiar, since there's not really anything to learn from it: Eagle's sick, but running. Gremlin's engine is out to attend to a clearance problem between oil pump pickup and pan (they ended up getting a little too close. Always use a new pickup, kids!). Rear suspension is still out of whack, but hopefully getting better. Despite traveling back in time, the numbers on the calendar move forward.
Now, to the news/helpful info:
1) Previous pickup installation failed due to a combination of factors; lack of experience, poor preparation, and penny-pinching being the main causes. See, I knew I didn't know well enough to challenge repeated advisements against reusing a pickup tube, but I did it anyway. If I had made sure to get a new pickup, chances of me having to do the installation again probably would've dropped by the official ass pull number of 75% or so. The remaining 25% is from an idea that had not occurred to me at that point in time.
A buddy of mine suggested I use a dry ice/acetone bath to cool the pickup tube before driving it into the pump. I already have way more acetone on hand than most really should, and dry ice is cheap, so I decided to give it a shot. After using this combo (which chills down to around -109°F once the dry ice sublimates), installing the tube was a quick and easy job. I highly recommend going this route for these kinds of tasks (usual wards against litigious stupidity invoked here, meaning, be careful with the shit).
2) The AMX has left the car hole in quest of bigger and better things!

Two brothers from across the Sound purchased him a couple weeks ago, and are doing a round of fixes to get it ready for a navigation challenge before tucking in and doing some more in-depth restoration work with it. I'm thrilled to see it getting back in action. Seriously. They sent me a video of it moving under it's own power for the first time in over a year.
3). I've come to suspect Eagle's remaining problems have been tied to the brake system. Unfortunately, no improvement was seen after inspecting the drums (and finding the right shoes were installed backwards, because I'm a smarty pants) and making sure everything was as it should be. It stops when I ask it to, so the investigation ended there. To be frank, I just don't have the time to keep feeding into it, especially given that the Gremlin is at a point now where it can resume it's duties as my actual vehicle as soon as I get this rear axle mess sorted out.
Speaking of which,
3) The rear axle still isn't aligning correctly, resulting in yet another teardown of the rear suspension. I'm not going to say that I think I've got it now, but I have discovered some interesting things.
A number of things just weren't adding up in how the rear end was coming together, from the shock length to the pinion angle, so I decided to check the parts catalog to see to what extent the rear of a '76 Pacer that I found listed for parts would work out. Here's what the '77/8 page for Gremlins, etc shows:

See the adapter plate between the axle perch and the isoclamp plate? This was the first time I had, because the Gremlin doesn't have them. Now, let's look at the entry for all Pacer years (or at least from '73-8):

This layout is what the Gremlin has had since I've had it. Note the difference in axle perch, which doesn't require any adapter. That's the style of perch I have, and when these details are considered alongside the shackles that were on it (the mystery metal $10 AutoZone lift shackle special), I'm inclined to think that the Gremlin's rear may have been donated by a Pacer at some point. It's also possible that this is what it came with from the factory, and/or the catalog isn't totally accurate. Who knows? At the least, I found it interesting.
4) I've had it with trying to preserve the AC system. It's tried to kill me for the last time when I was pulling the engine, and I also found out that it actually had been converted to R134a at some point (but no sticker to announce it was ever seen). That said, I'll pull a Sanden compressor and other mess from a Fat Cherokee as soon as I can find one that isn't in the yard with extensive front-end damage.
5) In the theme of retrofitting and "wish I knew"s, the PS pump and bracketry has been given the 86 as well. Partly because I discovered that the newer GM Type II pumps will work great with my quick ratio steering gearbox (with less power sink and heat, to boot), and also because the old Saggy pump housing was mortally wounded in the aforementioned attempt on my life made by the AC system.
Fine tuning, I guess.
Friday, April 20, 2018
+++ BEGIN TRANSMISSION +++
Minimal update, but I wanted to post this before the day has passed on. Today is an incredibly special day, as SLEEP has released their first album in over a decade, "The Sciences". The Gremlin and I now have another book to hear from as we make our journey and return across the sands.
I refused to let the fugitive status of my Bluetooth speakers, and the fact that my only 12V DC power supply died from ingesting grinder seasoning keep me from listening to this for the first time with the beast that carries my weight on its back. Not while I have multiple car batteries, that is.

I refused to let the fugitive status of my Bluetooth speakers, and the fact that my only 12V DC power supply died from ingesting grinder seasoning keep me from listening to this for the first time with the beast that carries my weight on its back. Not while I have multiple car batteries, that is.

If you look just right, you can see the face of Iommi defined by the shadows.
+++ TRANSMISSION END +++
Saturday, April 14, 2018
I'll pass on making a pop culture joke
And will instead say that the Concord is about ready to take off. Yeah, the Concord AMX. Remember that guy?

Here's the front, where it's looking like evil-twin Gremlin with an ass end. I put an ad up on Craigslist a while ago and have had a couple bites, so I made sure to get around to getting her running again. Here's the first start:
I think it's kind of funny that the AMX got it's first start before the Gremlin. Ha. Haha. Ehhhh. . . Ahem.
Nah, it's fine. The 'cord got just enough love to run. It'll need a little bit of sprucing up before it's ready to be a daily driver, but the Gremlin's getting all the real love.
Posting the ad has reminded me of how much fun Craigslist can be. I'm amazed by what some people think they're going to get for an $800 asking price for a car that had a production run of about 2500 units. I've seen others posted and sold that have been in faaaaar worse shape for well over two grand.
"What condition is the interior in?"
Who cares? It's $800.
"Is it complete?"
Yeah. I'm looking for someone to take advantage of my stupidity. Please buy my niche collector's vehicle that's all complete. It's $800.
Don't get me wrong- it's totally valid to ask these questions. In addition to others and as a curiosity.
What's not cool is to only ask one of these questions, having so little care as to share your name or use punctuation, and making it clear that you're only interested in getting an Awesome Deal, with no desire to do any work on it or intention of acting as a curator of a small piece of history. Then sealing the deal by opting out of acknowledging a polite response that confirms, "No, you ass. It's not a mint, showroom condition, car show ready, 100 miles on the odo gift to you for being an amazing person."
I didn't really respond with that, but I should.
Regardless, I'm pleased. I'm in regular communication with a couple of folks about it, with the guy who has first call on it talking about wanting to work on it with his brother and being ready to take it on as a fixer-upper. The other guy is into Concords and is looking for a new project since his latest one is coming to a close. If I can see it find a home like that, it'll be well worth it to me to let it go at this price.
Thursday, April 12, 2018
Before you know it, they're all grown up
Where's the Gremlin at? I've been maintaining this log for many months beyond what I expected, and it's been a long while since I posted anything akin to a status report. So again, what's the deal?
Well, at some point someone snuck in and got a lot of stuff done. I got the transmission cooler lines sorted out, thanks to the donation made from a 1996 Large Cherokee. Exhaust test fits have been made and things look promising to that end. That said, this is what I need to do before I can button up the interior:
Well, at some point someone snuck in and got a lot of stuff done. I got the transmission cooler lines sorted out, thanks to the donation made from a 1996 Large Cherokee. Exhaust test fits have been made and things look promising to that end. That said, this is what I need to do before I can button up the interior:
- Install flex plate and trans (using ARP bolt kits 240-7301 and 200-2905).
- Replace oil pump pickup (should've replaced the old one in the first place. It's hanging low and getting blocked by the slight difference in sump design used in the Spirit, which is what the replacement pan came from).
- Install shifter column cable built from XJ parts and using an adapter bracket based on aftermarket products.
- Get an appropriate sets of leaf shackles installed. The ones packaged in the Prothane kit are unusable without an extreme degree of machining to remove about a quarter of their overall mass. I found the same kind of shackles that the Gremlin had when I bought it, and they were only $15. They seemed to do just fine for a good, long while before I got them, and I expect they'll do just as well with new leafs and bushings.
- Install gas tank and get it hooked up.
- Cut, bend, and weld the exhaust pipes to mate them up with their side pipes.
- Connecting engine bay hoses, wiring, etc.
- Replacing the rear flex line in the brake plumbing with something more sensible than the integrated tee design.
It's really far less than I thought, and far less than others seem to believe. Soon enough, suckers!
Sunday, April 1, 2018
Eagle engine mount replacement
Absurd. That's the only polite word I can use to describe the process that I had to go through to get the engine mounts changed on Eagle. Seriously. Look at this:

I'll explain what the hell that embarrassment was needed for shortly, but rest assured it was necessary (unless I wanted to drop the front crossmember, or pull the intake and exhaust manifolds).
Before I get too far ahead, I want to make it clear that this process is entirely undocumented. I found next to no forum discussions, articles, videos, or anything else that explained how the hell to get this job done. Just look at what the TSM says on the subject:

I suspect the first draft was the same format and character count, with all the words replaced with "ha ha ha ha".
Last detail before I get started: since my CV axles exploded several months ago, they've been deleted and replaced with axle stubs through the wheel hubs.
If you still have functioning 4WD, you'll need to unbolt your CVs from the axle flanges and hang them from the subframe. I don't know what impact that will have on clearance, but I imagine it would be a lot. If you have old CVs laying around, you might want to consider separating the stubs and using those as stand-ins while replacing the mounts. This isn't a documented and verified practice, so who knows what demons you're tempting by going that route. In my case, it worked fine.
Whatever you decide, DO NOT just remove the CVs and leave the hubs empty. You're risking wheel separation and a painful maiming/death if you decide to do that. So with all this said, I'll get to the point.
When replacing either mount, you should loosen the center cushion stud nut of the opposite mount. This allows the engine assembly to pivot and the brackets of the mount you're working on to separate. You can use a floor jack to lift the engine from a point closest to the mount you're replacing, similar to what the TSM mentions.
The right side is fairly straightforward; lift, separate, and replace. I needed a prybar to get the last little bit of clearance, but that was all.
The left side. Well, the left side is a cruel and disgusting monster that cares for your feelings only enough to want to crush them. It hates you. It hates your friends. It hates anyone who has ever shared a passing glance with you. It sucks.
To slay this dragon, the Eagle was put up on ramps. You should consider any approach that you feel would be safer when using a floor jack (or hoist) to lift the engine. This side of the engine can't be raised high enough to extract the mount cushion before the top of the right axle contacts the frame, which causes the spread of the mount brackets to hit a dead stop.
Lucky for you, getting the left side replaced doesn't require a full removal of the axle assembly. That's about where your luck runs out, though. See, the axle assembly is mounted to the block by way of three brackets, one on the right and two on the left sides of the block. The forward left bracket is the upper engine mount bracket, which also bolts into the top of the front diff. The rear left bracket has two bolts fixed into mounting bosses on the block, and two bolts affixing the bracket to the front diff pinion housing (all of these bolts are 5/8 hex, and using six-point sockets is highly advised).
This is really interesting when compared to the bracket on the right, which uses only a single bolt and nut pair to couple the bracket to the right axle and support bar (which attaches to the bellhouse near the starter). The way this is designed, the left connecting fasteners can be removed and the right support bar and bracket bolt and nut pairs loosened to allow the right bracket to act as a hinge. Doing this will let the front diff drop downward on the left side as it pivots on the right bracket's bolt.
Getting to that point, however, is much easier said than done.
To access the bolts on the left, you'll first need to remove the sheet steel that is formed as a dust shield above the left axle. This is your introductory point to what kind of madness you're about to face. It's fastened directly to the subframe rail by a fine thread, 3/4 head, self-tapping bolt, which is about 2" long and secured with blue thread lock down roughly half its length. I found nothing else to be connected to it, but I suspect it also acts as a talisman that keeps some sort of horrible evil at bay. Remove it to gain access to the pinion support bracket.
Separate the pinion support bracket from the block by removing the topmost bolts, then remove the lower two bolts that connect to the diff. This bracket will need to be removed to access the fender-side bolt that fastening the mount bracket to the top of the diff.
Before moving on to the remaining two bolts, remind yourself to check and make sure you have the diff supported from below.
Once confirmed, remove the fender-side bolt and find every extension you have to create the beast in the first picture in this post. Pay attention to where the universal adapter is, as well as the wobble extensions. Believe it or not, these are important details. Though the articulated head on the 1/2 driver wasn't necessary, it did help.
To free the remaining diff bolt (the one closest to the block), feed your extension chain through the top of the narrow space between the intake and exhaust manifolds, just in front of the runner for cylinder 4. Cuss, beg, and plead with the fates to allow the socket to seat on the bolt head, and have someone steady the extension while you turn the whole assembly with a breaker bar. Here's a picture to demonstrate (note the location of the socket, circled in red):

Once this last fastener is free, you can lower the diff and place a wood block/specialty tool above it, aligned in such a way as to contact the bottom of the bracket you just removed the bolts from. Then you can raise the diff with the jack and lift the engine on the specially tool enough to swap the mount cushion. It may be worth noting that the 2x4 we used as our specialty tool broke during the last jack pump, so be careful.
Order of installation is reverse of removal, though the tears of despair can't be taken back.
EDIT: Even though you'd be wise to suspect otherwise, this is not an April fool's joke. This is far too painful a subject to joke around with.
Saturday, March 31, 2018
The Dutch method of exhaust leak repair
Say you've found yourself with an Eagle that had far too attractive a cat converter for someone else to pass up. Though you're now minus a cat, they were nice enough to replace it with a straight pipe, but weren't bright enough to effectively seal the switched runner tube connected to the manifold. You'd find yourself with quite the exhaust leak, despite the thief's best attempt being made to clamp the tube shut with a parts store clearance rack set of $1.50 vise grips. Here's what to do when that day inevitably comes.
1) Go to the grocery store to get dinner.
2) Before going inside, mix up a generous helping of JB Kwik.

3) Find an extra finger.

4) Break it off, turn it inside-out, slip it over a meat finger, and slather your exothermically-reacting goo all over it.
5) Get distracted by how impressively warm it is.
6) Remember you have a very short set time, and that the heat of the exhaust tube isn't going to help.
7) Scramble to get your sticky finger jabbed up at the end of the tube, while having no regard for personal safety or cleanliness (as per usual).
8) Roll the extra finger off the meat finger and onto the tube, making sure to mash as much already-set epoxy into the tube as possible.
 Note: my extra finger rolled off before I could get a picture.
9) Go into the store and get dinner.
10) Return to your Eagle and be amazed that the exhaust leak is gone, though expect to be doing more of this kind of thing. Kwik Weld is only supposed to be able to withstand temps of 230°.
1) Go to the grocery store to get dinner.
2) Before going inside, mix up a generous helping of JB Kwik.

3) Find an extra finger.

4) Break it off, turn it inside-out, slip it over a meat finger, and slather your exothermically-reacting goo all over it.

5) Get distracted by how impressively warm it is.
6) Remember you have a very short set time, and that the heat of the exhaust tube isn't going to help.
7) Scramble to get your sticky finger jabbed up at the end of the tube, while having no regard for personal safety or cleanliness (as per usual).
8) Roll the extra finger off the meat finger and onto the tube, making sure to mash as much already-set epoxy into the tube as possible.

9) Go into the store and get dinner.
10) Return to your Eagle and be amazed that the exhaust leak is gone, though expect to be doing more of this kind of thing. Kwik Weld is only supposed to be able to withstand temps of 230°.
Sunday, March 25, 2018
Working like a whole mule to write this half-assed post
Found the cause of the tcase leak I last wrote about was the output shaft yoke seal being dry, hard, and leaky, the yoke having deep grooves inline with the seal springs, and a spline washer that was rotted and poorly installed. The yoke wasn't fully seated, as well.

As you can see, the seal replacement is going well. It'll be better tomorrow, when I return to the place where Eagle is camping across town, with the shop seal puller in hand.
Did a yard run in hopes of finding a suitable yoke, didn't, but discovered the existence of speedi-sleeves and how absurdly proceed priced they are.
Also got new trans lines for the Gremlin (kindly donated by a mid-90's Grand Cherokee).
I've been soaking in transmission fluid for the past three days. Going to sleep now so I can make it four tomorrow.
Thursday, March 22, 2018
Boxes are bridges to fences
Awareness is kind of a problem. See, we base all of our decisions on it, have no way to escape it without putting ourselves in some degree of danger, and arguably case to effectively exist in its absence. The real fuck of the situation is that awareness is just a product of our constant internal comparison of pieces of information. As though that's not enough, it's not even "true" information, since it's internally-recorded and based on our recollection of that information. It really amazes me that we're able to get anything done at all when I consider how much of a fundamental challenge to effective action that condition presents.
Even though navel gazing is a great way to figure out the most expedient way to talk out of your ass, I promise I have a real point to make here:
My transfer case only had about 3oz of fluid come out when I drained it.
Seriously. 3oz is a lot less than the 2.5 pints it has the capacity to carry, and the groaning, hopping nastiness that I thought was the transmission dying, or the torque converter not being secured to the flexplate, or whatever other ideas I had started over 1,000 miles ago. It's incredible that things worked at all. It's also incredible that my tcase housing didn't fragment like a party popper on the highway or any of the thousands of steep-ass hills I traverse all day, every day.
And here's what that paragraph has to do with the one I started this update with:
It took a long damn time for me to figure out that the problems were coming from the tcase, due in no small part to my lack of familiarity with troubleshooting and investigation flows for 4WD/AWD machines. Coupling that with the experiences I've had with the transmission in the past, I had a pretty large gap in my awareness of what was actually occurring. As a result, this con/perceptual void kept me chasing what I knew of that could potentially explain the behavior I was encountering.
Form was brought forth from the void, though, when I lucked out and actually managed to get a good listen to the sound when it happened today. It was distinctly coming from under the car, where I knew the tcase to reside. Once I got where I was going, I set about changing the fluid and just got done taking the first steps hill I've taken at a speed over 15mph in quite a while. It felt effortless, I felt good about it, and I think things may be moving ahead without binding up. It would've been nice to get this fixed much earlier in the game, but at least it happened before I lost the tcase while driving in traffic.
I guess that the end result is a pretty unpleasant experience may have been avoided, and this reminds me of how many problems are directly tied to shortcomings in awareness. I'm just happy that the issue turned out to be one that I could discover a cause for, and the only barrier to doing it was my lack of information.
This experience has kind of underscored my objection to opaque digital systems being a mandatory organ in all modern cars. While my preference is to not have to do network/computer troubleshooting as part of vehicle maintenance and repair, my need to understand how to care and feed for over a ton of steel that is capable of traveling at 100+mph is even more important. Proprietary digital controller systems are intentionally made to be voids in your awareness. This is why you have to pay through the nose to get software upgrades and other intangibles that sometimes play a very important part in ensuring the vehicle is operating safely or at all. No auto manufacturer will give you the documentation on the circuits and code that make up your vehicle's *CM, and it's impractical to impossible for most people to get that information from any alternative source.
If some people end up getting their way, it'll eventually be impossible or illegal to repair or modify your own vehicle. Hell, you most likely won't even be able to even drive it yourself, despite it costing you two or more years worth of your annual income. The future sucks.
Sunday, March 18, 2018
What's this update share in common with a sack of pea gravel?
They're both full of a crapload of little useful stuff that's set to spill all over the place and make a mess without giving any notice.
So let's get this show on the road! Here's some developments, odds, and ends in no particular order:
⚡Getting the Gremlin's exhaust routing figured out to accommodate the true dual exhaust side pipes just became a lot easier for me after paying attention to the plumbing under Eagle during some exhaust leak patching excursions. See, as luck would have it, the presence of the t-case on Eagle demands the routing of the exhaust from the driver's side (where the 258 exhaust manifold resides), across the body (between oil pan sump and inspection cover), to passenger side, where it makes a 90° bend before meeting the cat. For rigidity, the cat incorporates a bracket in its front collector flange that acts as a hanger and bolts to the transmission skid plate (or thereabouts. Memory is slightly fuzzy on the exact fastening point).
Though the hanger design won't be directly useful, Eagle's exhaust does provide me with a ton of useful reference data for the placement and radius of bends for routing exhaust to the passenger side. Enough so that, when the stock plumbing is taken into account with the placement of the collectors for the header-style manifolds, I should be able to verify whether it's feasible to get these segments mandrel bent at a muffler shop that has templates for each vehicle.
I'm gonna wander to a shop today or tomorrow to see if I can't get a ballpark estimate of what the cost would be for sections from each, from collector to cat. I reckon that a little bit of grinding/bandsaw, hammering, and some strategic placement of flex couplers, I should get sorted out at a fraction of the price I'd pay for it to be done up at a custom shop. There's also the serviceability aspect of basing the plumbing off well-documented (please god, let that assumption be correct) templates that are widely available, versus a custom job that will require measurement, tracking, and manual bending to fab replacement segments for.
⚡⚡ Eagle's TC bolts were checked and tightened a bit. My half-assed method to check for whether or not a bolt was loose was to get a wrench on it and turn while grabbing the flexplate with my other hand. If the bolt head turned, it was loose and I cranked down on it until the engine crank & flexplate turned. If the plate turned, I kept turning the wrench until the next bolt was accessible.
While admittedly far from correct, it was a good enough method to allow me to find that two bolts opposite from one another were about 1/4 turn out. That strikes me as plenty of slack to produce the knock at the volume I was hearing it at. As you may have guessed from the tense used in my previous sentence, I've yet to hear the sound return since making that adjustment.
The groan at takeoff, however, persists. I heard it yesterday during a rare moment of my having the windows rolled up and my stereo silent, and suspicions relating to the hub are starting to return. It's tough to say, though, as it's nowhere near as pronounced as it had been. It could well just be TC shudder (though I doubt it, since it doesn't happen at higher speeds/RPM). Next step will be to pull the CV axle stub I've been using since they broke a few months back and see if the splines are stripping out. If so, that would explain the sound, feel, and diminishing intensity of the groan. I'd prefer that I catch that before the inside of the hub wallers out, though.
⚡⚡⚡ The F150 that we've been tending to is up, running, and rolling along. There were a couple slight complications, but I have to say that it was a pleasure to work on. We may have a little more work coming in from that particular truck, since there were a few things noticed that really deserve some attention, but as far as the idle issues it was having, it was partly from the carb and mostly from a deteriorated manifold gasket that had been causing a nasty manifold vac leak.
The YF's metering rod and jet were found to be pretty messed up during the rebuild efforts. A channel had been worn into the jet passage, either through the rod being bent during handling at some time in the distant past, or due to a setup error when the metering rod was last installed (maybe both). Searching online for a replacement jet was no problem, however the metering rods are flatly unobtainable as replacement components.
By grace or curse, I've discovered I have a talent for finding things that are normally in the zone of impossible to source. Unfortunately, this talent doesn't really extend to things I have a direct need for. This makes me a pretty handy go-to guy for folks in need of weird shit and obscure parts, so I went to the closest yard to see if I could find any YFs to pull or pull single components from.
My first attempt netted squat. There was a total of 5 carburetors (domestic, of course. Didn't bother looking at imports, though in hindsight it might have been worth checking. I wouldn't be surprised if Carter supplied a carb or two for imports to employ in the American market.), 4 of them being quadrajets, and the other being a single-barrel Mopar. . . thing. So I loaded up in the Eagle and took a 30 mile run to the next yard, where I found nothing again.
On the first pass, that is. On my second run through, I decided to check under the hood of an '89 Ranger, and bam! Found a picked-at YF that still had it's metering junk, and in perfect condition to boot! After that, the rebuild was simple (after I remembered the bottom level screws thread in bottom-up, not top-down).
Getting the manifold gasket replaced actually turned out to be a much faster and easier affair than rebuilding and configuring the carb. I was sincerely amazed. Not a single broken fastener, no forever-scrubbing off of the mating surfaces, and not a single crack in the intake or exhaust. It went how you always think of jobs going when you're quickly running through order-of-operations in your head when planning on doing something, and not the doomsday clusterfuck that a lot of tasks end up actually playing out as.
So that's about where we're at. I'm having a little bit of a challenge with making some decisions with sourcing flexplate bolts for the Gremlin, but that's a different story.
Wednesday, March 7, 2018
If you think you found the problem, yoke's on u!
One thing I can't be accused of lately is having a surplus of free time. I mean, I guess someone could make that assertion, but no way in hell would it hold up in court. That's why my updates have fallen in the band of "infrequent to rara enough to start assuming the project went dead". My odd jobs have consumed far much more of my time than I think anyone could reasonably assume, and Eagle has become very cranky as this never-ending winter continues to grind down on this god-forsaken territory. These factors combined have slowed my progress on the Gremlin to the pace of a snail on barbiturates. Despite this, I still have some news to report.
The last few days have been spent by my friend and I investigating and attempting to remedy the cause behind a 1978 F150 with a 4.9L I6 being unable to hold idle. I'll bet I'm not giving anything away by saying that it was determined to be caused by the Carter YF that it came equipped with. After a rebuild and attempted tune, idle is now maintained on both circuits, though low RPM is accompanied by loss of vacuum, making the slow idle circuit require a much higher RPM than is advisable. Consequently, we may have further work ahead of us in the form of installation of a new manifold gasket.
I've also managed to install the Gremlin's flexplate, though my clearance situation demands an open-ended torque wrench. I'm hoping to find a clever solution that doesn't hinge on spending more money, but I'm not sure that's in the cards.
Speaking of things around the transmission and clever solutions, I came across this video that would've been a godsend when I was pulling the trans and will be a huge help when I finally get it bolted back up. The video covers taking care of those damn top three bell bolts, and the access via the firewall is the same for my '78 Gremlin with AC (not a big surprise there). Really handy info- check it out here:
https://youtu.be/Hf3usGA0-78
While Gremlin sits neglected, Eagle is still playing little brother. Recent developments and persistent behaviors have steered my attention with it towards it's flexplate, but I'm getting ahead of myself.
If I didn't mention it, the problem that prompted me to do the trans fluid change was a resonant groan that would come from. . . somewhere when I was moving uphill under load, accompanied by a lack of power. If I didn't let off the gas, this would be followed by a hard shudder. The fluid change had no real effect, and the behavior was intermittent. Since I usually drive with my window rolled down, it began to sound like it stemmed from the front left wheel.
I checked the torque on the spindle/axle nuts on all four wheels and found that the suspect wheel was slightly below spec. The issue persisted.
I thought that it could be the slip yoke, so I greased the hell out of it. No change.
I had some u joints that fit, and Eagle was overdue for a change, so I got that settled. It made zero difference.
I should mention at this point that the knock I was hoping had been coming from the AC compressor returned. This is important because I found a video that featured a 4.0L Jeep demonstrating a condition that I had previously never heard of: torque converter to flexplate knock. Suddenly, all of the problems I thought previously to be unrelated, the bad radiator, the knock, and the slug groan could all explain a cascading failure. If a torque converter is cooking and ballooning because of a failing radiator, it could make the flexplate to crack, or at least work the bolts loose.
Tomorrow I'll be pulling the inspection cover and counting my blessings that the cat is still pulled to aid in other troubleshooting efforts. Reason being is the small switched exhaust pipe that runs right in the way of the inspection area won't be an issue. As an aside, it's pretty irritating that this piping is run like that and the service manuals say jack all about how you're supposed to deal with it in a stock configuration.
Regardless, here's hoping that the lack of usual symptoms of a failing torque converter means that I just have to tighten the bolts that attach it to the flexplate. . . Good god, do I hope that's all that I need to do.
Monday, February 26, 2018
Putting your best face forward

Finally managed to pull the flex plate from the Gremlin today. This was after a discovery last night, where it became clear to me that someone (presumably a very crafty burglar) had carefully unbolted the cat from the downpipe flange and cut said flange and the cat's exit pipe with a small reciprocating saw, leaving me to do a parts store run or two and a trip to my friend's house across town with no muffler. The sound was pretty awesome.
Exhaust repair was the name of the game prior to this evening, as well as driveline greasing at the slip yoke and ujoints in the hopes of correcting a hard shudder from the rear on acceleration. I'd share any pictures or lessons learned if I had any, but the closest I can muster is "don't do exhaust work on a car on the ground when it's hailing outside. It sucks." Since I guess you're supposed to keep rolling when the dice are hot, I trucked on over to the shop after Eagle maintenance and found that it was a damn good thing I decided the flexplate had to go.

In case my crude attempts at making things clear isn't successful, let me clarify by saying that the crack I had noticed was accompanied by three more that I hadn't. Really, it looks like this fella would've kept working just long enough to give me a reeeeeeeeally bad time.
Getting the plate out wasn't as easy as I would've liked, mostly because of where the crossbar that my lift is designed to use comes across right behind the transmission bellhouse. This left me with just barely enough room to fit a socket and ratchet in, and not a bit more than what I needed.
All the same, it really wasn't too bad. I think the real challenge will be torquing the bolts to spec once installation time comes. I probably would've had an easier time with the whole thing if I'd used jack stands, but that would've entailed a whole other kind of mess I'm happy to not deal with.

Once I rejoined the surface world, i compared the old flexplate to the older flexplate. Everything lined up, neither of them had holes where the other didn't, and they we're both made of metal. Looks good to me. If I end up having any problems with the replacement plate, I'll likely get the 4.0l plate and starter, which will do me favors as far as parts-availability goes.
I have an update that I'll post as soon as I'm sitting still in a place where I have a WiFi connection for long enough to write it up. It's concerning the transmission fluid & filter change/low band adjustment I did for Eagle a couple of days ago, so isn't terribly amazing, but does have a few surprises. Until next time, if it takes me a while to post an update, it's probably because I'm either hard at work or dead.
Sunday, February 25, 2018
Go to hell, air compressor.
No updates for Gremlin- yet. I expect that we should see some developments really soon, though. If you actually manage to read this with any regularity. . . Well, keep doing that, I guess. Something's rew bound to happen at some point. I can be sure of that much.
This isn't to say that car stuff hasn't been getting done, though. Eagle's been getting a fair degree of attention lately, though I admit the inspiration hasn't been without fear that it's going to die horribly in some way.
There's been a really crappy-sounding clatter coming from the engine bay for quite some time (about a year, I guess?) that has been a pain to diagnose through and around. My guess was a bad clutch on the AC compressor, since a stethoscope allowed me to trace the source to that part. I know that it's not difficult to test to see if a compressor clutch is screwed up, but I've had a mental block in the way when it came to actually doing it. See, by my thinking, doing that work would be either troubleshooting the AC system I could care less about, or chasing after a sound I was pretty sure I'd already tracked down. In so many words, I'd be needlessly pissing away time I don't have.
Since I've never had a need, want, nor desire for AC up here, all the compressor represented to me was a big, heavy pain in the ass that ate my gasoline and got in the way every time I had to do anything in the right half of the engine bay. I figured I could cut it out of the belt configuration and then pull the damn thing out when I felt like it. The only caveat was the fact that the alternator is indirectly driven by the crank pulley via the compressor pulley, so I got a dual slot pulley I pulled off an old yard Ford some time back and a new belt (the one that eventually fit is Duralast part number number 17403), and set to confirming my suspicions and increasing my mileage.
Things have been working fine since doing the bypass the other night, though at the expense of 10 hours overnight in the Asbestos Caverns. The modification isn't really that difficult, mind, it's just that it was one of those "the impossible becomes the standard in pursuit of all wrong things coming to occur." In other words, it was a hellish night of me being tormented by circumstance, my own stupidity, and constant sabotage and interference on the part of that goddamned compressor.
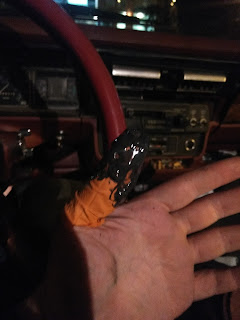
You might think I'm being melodramatic by accusing a broken inanimate object of having and leveraging independent agency to the end of purposefully subverting my mundane efforts to maintain a vehicle. In my defense, I ask you to consider whether you've ever encountered an object that was as directly antagonistic and rude as this:

Since then, the sound has been gone and the alternator seems to be charging just fine. With some luck, that'll be the new normal.
This isn't to say that car stuff hasn't been getting done, though. Eagle's been getting a fair degree of attention lately, though I admit the inspiration hasn't been without fear that it's going to die horribly in some way.
There's been a really crappy-sounding clatter coming from the engine bay for quite some time (about a year, I guess?) that has been a pain to diagnose through and around. My guess was a bad clutch on the AC compressor, since a stethoscope allowed me to trace the source to that part. I know that it's not difficult to test to see if a compressor clutch is screwed up, but I've had a mental block in the way when it came to actually doing it. See, by my thinking, doing that work would be either troubleshooting the AC system I could care less about, or chasing after a sound I was pretty sure I'd already tracked down. In so many words, I'd be needlessly pissing away time I don't have.
Since I've never had a need, want, nor desire for AC up here, all the compressor represented to me was a big, heavy pain in the ass that ate my gasoline and got in the way every time I had to do anything in the right half of the engine bay. I figured I could cut it out of the belt configuration and then pull the damn thing out when I felt like it. The only caveat was the fact that the alternator is indirectly driven by the crank pulley via the compressor pulley, so I got a dual slot pulley I pulled off an old yard Ford some time back and a new belt (the one that eventually fit is Duralast part number number 17403), and set to confirming my suspicions and increasing my mileage.
Things have been working fine since doing the bypass the other night, though at the expense of 10 hours overnight in the Asbestos Caverns. The modification isn't really that difficult, mind, it's just that it was one of those "the impossible becomes the standard in pursuit of all wrong things coming to occur." In other words, it was a hellish night of me being tormented by circumstance, my own stupidity, and constant sabotage and interference on the part of that goddamned compressor.
You might think I'm being melodramatic by accusing a broken inanimate object of having and leveraging independent agency to the end of purposefully subverting my mundane efforts to maintain a vehicle. In my defense, I ask you to consider whether you've ever encountered an object that was as directly antagonistic and rude as this:

Since then, the sound has been gone and the alternator seems to be charging just fine. With some luck, that'll be the new normal.
Saturday, February 17, 2018
Driving myself crazy, refueling often
Eagle was thirsty. All the time. I've been getting 9mpg since the winter gas change over, so Eagle's been seeing me after class for a while so we could work on bringing this average up.
After changing my motor oil, being vigilant about checking air pressure of my tires, cleaning spark plugs, checking timing, voodoo, hoodoo, begging, adjusting my carb mixture, giving up, and so on, I had one of those "should've been one of the first things to change" revelations: maybe I should quit using Safeway gas.
I didn't use their gas with the expectation of it being high quality. It was on my shop route and easier to get to than other places. Laziness and the illusion of saving money. I decided to fill up with Shell over a week ago, then decided to fill up last night when I was on the way to the house but not wanting to get back to the house yet. In other words, I filled up 3 days later than usual because I felt like it, not because I needed to.
The result? I'm now getting 12.43mpg city, as opposed to the slightly under 9mpg I got from the last Safeway tank. Keep in mind that this is with slightly saggy tires, a dirty air filter, winter gas, and a few hundred pounds of weight (probably about 600lbs, including the dead weight behind the wheel). I've got to admit, I didn't expect that dramatic a change for an extra .20/gal.
I also didn't expect to find I was paying so much more for shitty fuel. For $4 more per tank, I get 70 more miles of travel. That's a ludicrous difference!
Shell: $64/20gal tank (248.6mi)
Safeway: $82.86/27.62gal (amount needed to travel equal distance at a mileage rate of 9mpg)
So I've been paying about $20 every time I try to save $4. Anyone need a financial advisor?
Wednesday, February 14, 2018
George Washington's transmission (of Theseus)
My buddy has a 1996 Explorer with a 4R55E automatic transmission. With around 140k on it and shifting issues that required a full rebuild far less than 2k miles ago, it's back in the shop after we did a hall Mary fluid change yesterday.
See, it's throwing a code and failing to engage 4th gear, presumably due to a faulty solenoid, PCM, harness, gear goblin, or incorrect incantation and burnt offering combination being presented to the machine. Who the hell really knows? The reason I'm sharing this is because it seems like people have forgotten what the words "robust", "quality", or "good" can appropriately be used to describe.
When I read that the 4R55E is any of these things, it's quickly followed by a litany of caveats: "as long as the PCM/ECM don't fuck things up," "just make sure you fill it with distilled liquid gold, or Mobil 1 synthetic ATF," "leaving aside the phonebook-thick stack of service bulletin revisions that have to be made to make it operable," and so on.
Don't take this the wrong way - Ford is far from the only manufacturer that has this kind of thought surrounding a product they've brought to market. To bring this a little closer to home, we can look squarely at the Grand Cherokee and the electronically-controlled TorqueFlite that has been the source of many a pedal turned back and a dollar burned at the altar of Mopar, despite the TorqueFlite being an awesome automatic transmission platform. God knows I've put eagle's through hell, and it always has bounced back (clutch packs seized? Put that fucker in reverse and bash shit back in line!). The reason for this, though, is because it's hydraulically-controlled, not electronically-controlled. Eagle's transmission would've been toast long ago if it were one of the Jeep variants referred to above.
The technology at the heart of the A998 is all built on old, well-tested mechanical engineering principles of leveraging physical properties of fluids, abrasives, and gearing to perform a certain set of functions. Electronic controllers, while somewhat more mature now than what was used in 1996, are fragile, opaque, deeply abstract in operation, and better suited for use in iPods and throwaway consumer goods than in a machine that weighs a ton or more and is capable of moving fast enough to make an unidentifiable mess of man and raccoon alike. What's more, they often subvert the appropriate action of those mechanical components that they've been put in charge of.
The point of my meandering complaining here is not that "computer is bad" (though it really is), but that a system isn't worth shit when the subsystems and components it directly relies on in the performance of its functions are temperamental garbage. In other words, no, the 4R55E is not tough, robust, or even good, because all of the caveats that you tack on after are things that you can't take away and still have an operating transmission.
Hopefully I'll get old enough one day to actually warrant having hard-headed, anachronistic opinions.
Thursday, February 8, 2018
Baby turtles and alligators
Once I've committed to something, a short period of time is all that's needed to see it increase its mass fivefold, leaving me stuck having to feed it (if you've ever met my toilet, you know why just flushing isn't an option). Luckily, I'm not in this latest mess alone.
See, my friend and I have been working to pick up odd jobs lately to carry me over the remaining bit of work left with the Gremlin and put some cash in his pocket. The first gig we took on was clearing the overgrowth on about 60 square feet of land, followed by building a fence. To clarify: I don't mean that as a euphemism - we're literally going to be constructing a physical barrier around a piece of privately-owned property.
We went into this thinking that we'd have the overgrowth cleared within a couple days, totally failing to account for the 15' tall holly trees that were part of the 700lbs (and counting, based on the scales at the dump) of plant matter that was slated for eviction. Long/short, we've been hacking away at this mess for a while and I've not made a lick of progress on the Gremlin. We got a trailer, though!
After grinding through ad after overpriced ad, we finally found a trailer for a reasonable price, and the owner actually had a title! See, Washington has to do everything backasswards, which means you have to have a title and register trailers in this state. Despite this being a strict legal requirement, it seems that people register their trailers, use them twice, leave them to sit and rot for a couple years, then post them on Craigslist for about twice the price that they'd fetch in most other places in the country.
Regardless, we got our trailer, which is a homebrewed number comprised of a 60's Ford truck bed on a frame of unknown origins. The lights weren't operational at all, but we did a driveway fix (connected the ground) that resulted in rear lights on both sides, brake light on the left, right turn signal, and left turn signal (but not on the left. It activated the right side turn signal light as well). We made it two houses down the road before passing two parked cops that were facing down the dead end road we were coming out of. After reaching the stop sign, we decided it was best to turn right.
After a series of right turns through a town neither of us had ever been to, we stopped in what turned out to be the filthiest 711 parking lot I've ever had the pleasure to visit and proceeded to rewire the trailer with materials harvested from a cheap ass (totally inadequate) magnetic trailer light setup. As I laid on my back in the lot water, running the wiring, I noticed that there was a lot of bailing wire ties securing the bed to the frame, but not any obvious welds or fasteners. That was Sunday night, and we've still yet to find any.
It's perfect.
Wednesday, January 31, 2018
If you don't remain flexible, you're bound to get cranky and crack.
I'm going to try and do as simple and clear an update as possible, mostly because my cell provider has throttled my connection and it'll probably take another 10 days for this post to upload (all of my surfing the information superhighway has been done via cell for the past several months. Yes, I wrote all these posts on my phone. Yes, I have myself and want everything to be equally tedious and unnecessarily difficult.).


The majority of my time lately has been split between searching for odd jobs to bring in some additional income and waiting for FedEx. See, while I put far too much time into jig making, I neglected to apply the same thoroughness to confirming the numbers for my measurements were accurately transcribed. This is diplomatic wording for "I didn't pay enough damn attention and fucked up the backup driveshaft."
So with that, the hunt for an appropriate replacement began. This is what we ended up with:

It's a quarter inch longer than the stock driveshaft, which should be within the amount of play my slip yoke can provide. If you're wondering why it's not installed yet: it was delivered yesterday while I was fighting against throttle valve linkage issues that Eagle was having (luckily, this was remedied by switching out and repositioning my throttle return spring). Oh, and also, my flexplate is cracked.

I have no idea who or what managed to do this, but I've not done anything that would cause this to happen. Luckily, the Sportabout provides once more and I've got the plate that came with the transmission. As to the best of my knowledge, it looks to be a plate for the 258/232, and not the 304. While some online stores say they'll work across the board, I'm really skeptical because the 304 wasn't internally balanced like the I6s. I doubt that they swap out just fine, and a number of AMC greybeards are adamant that my suspicions are correct, so I'm going to take their word for it.
So given that the flexplate is cracked, the trans is in the process of being decoupled as I type this. I'll do a strict comparison once it's out, and that'll determine whether the Sportabout plate goes in or if I'm waiting for FedEx again. Thankfully, should a new plate be needed, I can get one for under $40.
Once that's done, I'll need to get back to doing the ujoints I'd started on, as the ones that came with the replacement shaft are of a different type (and the rattlecan spray isn't really confidence-inspiring).

Not thrilled about having to get conversion joints, but I'm not sending a ton of power or an unreasonable amount of torque through them, nor do I intend to take this car on the trail (at least until the day comes where I convert it into something along the lines of an Eagle kammback). That said, I'm sure they'll do fine.
Lastly, in honor of the donor Sportabout I never met, here's a picture of a local Sportabout I've been trying to catch standing still for a couple years. It's a '75 with a 304, and appears to have formerly been a city government vehicle. The owner says he drives it constantly and has had it for over 20 years. While his enthusiasm for his wagon seemed not to match mine, there's gotta be some love for it to be kept going for this long. You can see Eagle creeping around in the upper left corner.

Alright, that's enough fucking around. I'll let y'all know how things turn out when they get where they're going.
Sunday, January 21, 2018
I'm finally done with prepping the driveshaft for the big day. I made three sections for my jig, pictured here:

The first one ("A") took up way too much time and patience, as I was fucking it up because I didn't know what I was doing. Not unlike raising kids (or so I'm told).
I was relieved once they could finally do what they're supposed to on their own, because that meant I could actually get back to doing what I needed to, instead of constantly correcting and messing with them.

Driveshaft is level and looks to be straight. I'd go ahead with cutting it to get it over with, but it's too late to be running the bandsaw in my tarpaper shack, 20ft away from people's beds (though that's not to say that hasn't happened many times before). Now that I think about it, there are balancers on each end of that thing, and I haven't marked their corresponding end with the radial point to line them back up correctly. So I'll be doing that first thing when I get back.
Earlier in the day, I did a test on a new pair of "clench" wrenches I got in the hopes of making my ongoing struggles with line fittings lean a little less in their favor. I decided to give them a shot after seeing a video a guy recorded, showing him loosening a brake line fitting with one hand. The other hand was filming.
Now, I'm not a greedy person, so I wasn't hoping for anything more than the ability to consistently work on my line fittings without concluding the work by saying, "well, that's the last time that's going to be put on. Better make a note to get a replacement tomorrow." No need for one-handed sorcery- I'd just like to be able to perform maintenance on a critical system without mutilating its vital components every time I touch them.
I didn't want to jeopardize Eagle's brakes to test a wrench out, so I took a couple of spare line nuts and put a healthy amount of blue thread lock on before getting them good and tightly fastened, then set them aside for 12 hours. I'm completely aware of the fact that this isn't even close to getting the salty brake line, but it's what I had on hand without going overkill or spending a ton of time on poorly trying to determine something I'll figure out at some point anyway.
I loosely clamped one fitting in a small vise to keep stuff reasonably in place, but still be a challenge, then decided to try and see if I could round off the vise nut with one hand turning the wrench, and the other in my pocket. Turns out it turned out. I was able to easily free the top nut with one hand and without chewing the corners to hell. I guess I'll need to go play with the brakes on the AMX to see if they do just as well with real world bullshit.
Saturday, January 20, 2018
You should see this fence I've built. I've finally made it past journeyman.
Around a year ago or so, my friend and I were debriefing each other post-repair, which is nicer than saying we were screwing around and bitching about self-inflicted misery.
He started talking about how he has more stuff to do than time to accomplish it, and mentioned the fence around his backyard needing to be rebuilt. To illustrate why this was a big deal, he started giving a loose description of prerequisite tasks that quickly became recursive. I said something to the effect of,
"Don't forget the time you need to spend learning about CAD software, so you can decide which program's going to be best to use for rendering a model and plans. Not to mention the research on different material options and projected weather patterns for the next 10 years."
(NOTE: As I was writing this section, someone walked by the Eagle and said "nice fence!" to the owner of the adjacent house.)
We started joking more about it and coming up with more absurd dependency actions until the project would've cost somewhere in the neighborhood of $500K and a year's worth of man hours to complete before we'd had enough. Since then, we've referred to situations where you're oblivious to the fact that you're adding many layers of needless complexity to a project, to the point of making accomplishing it less and less likely, as "building a fence", "fence building", and so on.
The reason I'm sharing this anecdote with you is because I've been building a damn fine fence and want to tell you about it.

I'm lucky enough to have a driveshaft that I can use to make a serviceable replacement for the old one, and I don't want to waste my good fortune by being careless and sloppy when doing the work. This means making sure the workpiece is secure while still being easily rotated when welding it, my cuts are square, and so on.
The crudely scrawled plans in the above image represent my concept for pieces of an adjustable leveling jig to hold the driveshaft in place while it's undergoing surgery. The full jig is made up of three of these specialty tool and angle iron assemblies, which can be adjusted by adding washers to the joining fasteners, between the iron and wood.
Far from a perfect solution, sure, but I'm just too damn neurotic to accept using big C clamps and winging the rest of it as a proper way to do this. Regardless, I'm about to finish this smoke and go back in so I can get them wrapped up. I just need to drill and countersink the bolt holes for two more and they'll be done.
After that, I'll be able to waste hours on getting them adjusted until things are perfectly level from end to end. If I complete that before the next ice age, then it's time to get to slashing and hacking the driveshaft to the point of ruin, followed by preparing a list of shops to call for quotes on Monday.
Subscribe to:
Posts (Atom)