Monday, December 25, 2017

Motor's finally ready. No lie. Honest engine.

See?


Just ignore the trash.  That's what I've been doing and it's worked out well so far.

Everything's lined up, the AC idler pulley is in place and ready, and the PS pump is wearing its belt.  Once the stuffing and tape is replaced with the stuff that should be in/on the various openings, we'll be in business.

Beyond mashing the pump into the reservoir, fighting the car mounting studs, and pressing the pulley on, I also got the trans off the wood blocks it's been sitting on and onto the caveman dolly I bashed together (from other wood blocks).  Seems to work okay so far; hopefully it's cool with the sustained load.

After that, I got a few holes drilled through the hump for some center console mounting brackets.  Figured now is the time to do it, since soon there's going to be a transmission living underneath. 

Since I was in the neighborhood, I pulled the Gremlin's original throttle cable in favor of one I yanked out if an XJ.  It's also a lot easier to get to when there's not a motor in the way.  I suspect the section of cable from the firewall to the pedal may be about an inch longer than a perfect fit, which should be easy enough to attend to if it proves to be true. 

Eagle's doing fairly well, though brief groans during certain types of turns has turned into clunks that you can feel through the steering wheel.  Visual inspection confirmed that the pitman arm is about done, though I expect it'll last until the replacement arrives on Thursday.  There's not been any binding or resistance in the steering, so it should be good if I don't do anything wild.

Aside from Eagle times, the agenda is: install motor, bolt stuff to it (AC compressor, alternator, etc), install radiator, run hoses, route trans cooler lines, and install the trans.  Simple enough, right?

Sunday, December 24, 2017

Eyeache, My Ear


All the superfluous cutting and grinding I've been doing has gifted me with an incredible amount of steel and aluminum shavings, dust, chunks, and whatsis.

As of four days ago or so, some of that material assumed an uninvited residence in my left eye.  I managed to get it out after two days of very slight discomfort, punctuated by sudden, unexpected, half-blinding pain.  That very day, its replacement showed up.  We've been negotiating its departure since then, but the metal is really good at being evasive. 

Not really important information to share, but I think it does a fair representation of my journey to solve this problem that really wasn't that big of a deal to begin with.

To clarify, here's basically what was needed to get that power steering pump mounted:

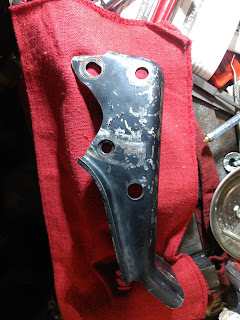
Cut this rear bracket, like so.


Done.  Seriously.  That's all that you need to do.  None of the other stuff I've been talking about the past few days is needed.  Just make a wavy cut, and if you don't like bleeding unexpectedly, deburr it.  Done.

Here's a shot of it fastened to the block:


I intend to buckle that top bolt hole to the intake manifold boss directly above it, but I don't have any steel stock that's the right gauge to put between them.  1/8" is way too thick, though a late 258/242 rocker bridge looks to be the perfect thickness.  I'll probably make it from one of those.

There are a couple caveats to the one-step solution.  First is that this cut is the only modification needed for the PS pump brackets.  I had to grind the crap out of the idler pulley bracket, and it's really not worth showing.  All I can offer is that getting it to fit is going to be a "chew on it until you won't choke" situation.

Another point to bear in mind is that I eventually gave up and decided to take a lazy route regarding how much adjustment I can make to lessen belt tension by pivoting the pump.  By leaving all the other parts stock, replacement of the belt will require pulling the fan and it's pulley after I take tension off the belt as much as possible through the normal means. 

See, without further modification of the front plate and rear bracket, the pump doesn't have enough potential travel to loosen the belt so that it can be removed without stretching (the aluminum "sling", or adjuster bracket, or whatever the hell it should be called butts into the exhaust manifold if you try to pivot the pump and slacken the belt).  It does, however, travel enough to give room for the belt to be slipped on or off with the fan pulley.

Since I don't plan on constantly changing belts, I figured that this minor inconvenience was a fair compromise to make so that I didn't spend another several days trying to pretend I'm capable of finding solutions to simple geometry problems while stuffing more metal in my eye.


Saturday, December 23, 2017

Observer effect. I own a singing, dancing bullfrog, but you'd never know it.

It's commonly suggested that having someone else come look at things can be one of the best methods to improve your situation when you're experiencing a prolonged and frustrating lack of progress while trying to solve a problem.  I've found this to be true, though not necessarily for the same reasons most people would.  

In my experience, people may or may not have helpful suggestions to offer that you wouldn't have considered on your own, but the biggest value that a detached observer can provide is simply being there.  More often than not, once I've finally resorted to getting a second opinion, whatever problem I've been fighting against ceases to manifest.  I'm not aware of any conscious change in approach, behavior, or conditions on my part that accompany these situations, though that doesn't mean those changes don't occur.  All I know for certain is that I have faced many problems that were real, but vanish once I have an audience that I can look like an idiot in front of.

Case in point: the idler pulley bracket that wouldn't fit.  Fits fine now that I had a friend take time out of his busy holiday schedule to come assess the situation and offer his input.  I didn't make any changes to my approach that I'm aware of, and I made no alterations to any other related components that might have allowed some clearance, but here we are.

Speaking of that bracket, I mentioned before that eagle has a small spacer plate between it's bracket and the idler arm.  My suspicion was that this spacer wasn't part of the Gremlin's original assembly, though I found an image from an old parts catalog that suggests otherwise. 


I also dug out the TSM for the belt wiring diagram and confirmed my recollection was off regarding what that pulley does.  As suggested in the previous image, it's actually used to route the belt for the AC compressor so that it will clear the fan pulley/thermostat.


I suppose I could've just paid a couple more seconds attention to Eagle's belts when I was taking pictures of the PS pump mess, but that wouldn't have been a guaranteed match to how they did things on the Gremlin.

Right now I'm working on getting the rebuilt PS pump buttoned up, taking pictures of the modified bracket, and cinching things down with all that before I make the last steps in motor install prep work.  I'll get back to you with that stuff here in a (rib)bit.


Friday, December 22, 2017

Some people say what they did in one sentence. I write a book.

So about that PS pump.


There's the stand-in, jacketed, bracketed, and waiting for its cozy to get hemmed so it can pivot when loosening its belt.  Don't get me wrong- I really wanted to grind that bastard down so I can move on with this mess and finally put this motor in.  Unfortunately, I was dropping things.  Constantly. 

That's generally my sign that it's time to stop and rest before I regret not doing it, so I decided to call it for the day.  I don't feel too bad, since I put in seven hours  (minus two smokes) of cutting and grinding after having been on the five hour metal quest. 

What really got me wasn't fatigue, though; it was the idler pulley bracket.  To sum it up, it won't fit this iteration of the 242's head.  Maybe it'll fit others, maybe it can fit this one and I'm an idiot, could also be both.  The important thing is that no amount of drilling, cutting, grinding, or cussing from me would get it to seat low and forward enough to share the top bolt hole with the PS pump front bracket/adjuster plate. 

After fighting with that bracket for a few hours, I said to hell with it and tried shoring things up with the pump's bracket, only to find that it needed even more grinding and cutting.  Then I said to hell with that, too.  Once I've finally finished with this bracket hell, I'll put up pictures of what cuts I made and all that mess so you can play along at home.

Before I started trying to club all this crap together, the pump assembly had been torn down for quite a while.  It's been even longer since doing eagle's pump, so my
 recollection of how all the components went together was dim and hazy.  When I got to the shop today, I took a second and looked over the pump assembly in eagle for reminders and to note any differences that may have occurred in the 7 years that passed between the two designs.

Here's the overall shot:


The first thing I noticed was the lack of the upper portion of the front pump bracket/plate/whatever (talked about this a few posts back), which I took as confirmation of that section being unnecessary. 

The next thing was disappointment that the idler pulley arrangement went unchanged, aside from a small spacer plate between the pulley arm and the bracket mounted to the block.  I've read that later Jeep 258 setups had this pulley repositioned to the passenger side, though I suspect that those would've been serpentine systems.  I'll have to look into it more- it would be nice to have something close to a straightforward alternative to coming up with a mounting design from scratch.

Lastly, the steering pump is single-pulley, not dual, like the Gremlin's.  I thought this was kind of strange, since they both have the same options and component placement.  The TSMs are in the wagon and the shop, so I can't check Gremlin's belt diagrams without getting up.  Until then, I suspect the Gremlin's dual pulley was put in place because the air pumps used during that period were placed right above the steering pump (I think the AMX here has one.  I may check when I get outside tomorrow). 

What do these pieces of info mean altogether?

Not much.  I'm going to go look at what to do about mounting this pulley.


Stop me if you've heard this one

I spent close to 5 hours driving around one of the country's 10 most expensive cities to live in trying to find 1/8" sheet steel.  No dice.  I've touched on the today lack of materials availability here, but it never ceases to amaze me when I run into it.

I finally gave up and got bar stock I saw yesterday, planning to butt weld the pieces together.  Turns out the bracket would fit on a single piece of that stock I could've picked up yesterday.

Knocked out the bracket, only to find new clearance issues.  Decided to check placement with the original bracket.  Discovered my modifications made the new bracket incompatible with the rear bracket.  Meaning I have to use the OE bracket, so I didn't need the steel after all.


Thursday, December 21, 2017

And an even stronger finish

Current weather:
Cold as fuck, foggy.  Burton with disaster.
Beware of black ice!

I haven't gotten around to patching that tire, but I'll tell you what I have done.  When getting my ps pump, I also grabbed the correct manifold gasket.  If you aren't aware of how much of a difference there is between the pre-'00 and later ports, check this out.

'00 and later:


And earlier:


I installed the intake and exhaust, for real this time.  No picture since it doesn't really look any different than it did before.  I can say without a doubt that no person without some kind of NASA space gear can get to those manifold bolts with a torque wrench in a way that an accurate measurement can be had.  No wonder it seems like I see so many Jeep folk complaining about manifold leaks.

I also discovered that the hardware stores in town (which all pretty much stock the same selection of sheet and bar metal) carry up to 16GA sheet, followed by 1/4", meaning I was screwed for the 1/8" steel I needed to make my PS pump bracket.  Luckily, I had stock that could be butt welded together and used as a mock-up.

Here's the test bracket laid over the original.  I'm still on the fence as to whether the top portion of the original is really necessary, but we'll see tomorrow, after I get some real sheet from the metal supply I learned about half an hour after they closed.


Here's the old bracket laid over the test.  The only difference between these (aside from the questionable top portion) is the hole pictured on the left:


In order to allow clearance of the PS pump retaining bracket (the big, two-part aluminum cradle) and the exhaust manifold, I pivoted the leftmost hole over 1", which is to say that the distance between it and the top hole in the picture are the same on both the original and testing brackets.  Test fit and adjustment of the pump assembly was great, leaving design and fabbing of the rear bracket to be done tomorrow.

Speaking of brackets, I picked up a 3/8" recessed brass plug for the temp sender port in the tstat housing and checked if the idle pulley bracket assembly cleared after the plug was installed.


It does, but we're still seeing some interference between it and the front corner of the head.  I'll be grinding the bracket a little more tomorrow until it's fitting proper.

All in all, I'd say it was a pretty productive day, after taking into account that it began with a totally flat tire and no spare on hand.  Hopefully the gods are pleased by my perseverance and they'll back the fuck off for a while.


Wednesday, December 20, 2017

Off to a strong start


Hell yeah!  Aired it up, got in to limp over to the Firestone, found out my tape deck adapter somehow died in the night.  No biggie; that just means I'm listening to Motorhead tapes instead of Motorhead from my phone.

Arrived at Firestone, got told it wouldn't be fixed until tomorrow afternoon.  Rolled across the streets to the Safeway asbestos parking garage, and was back to being totally flat (not even 2mi distance).

Further inspection uncovered the following:


Thankfully, a friend of mine was able to give me a ride to the shop, where I hoped to have a spare 15" wheel among the 21" set that came with eagle when I bought it.

Luck was close enough to being on my side.  Eagle's currently fitted with a set of  205/70R15, and the spare has a 215/70R15. 


Good enough for now.  I've got a gasket and a power steering pump to pick up (and a tire patch kit, I guess). No time for this shit.  Back at it!

Maxing pump, pushing pulleys, and moving the sender

A common detail of the head swap from a 242 onto a 258 is that the power steering pump bracket "won't fit".  I've not found a lot of specifics on where the interference is, and I've never seen a pattern available for new brackets.  I'm hoping that I'll have added something of that sort by the time I finish getting the motor ready.

Here's our pump and front-most bracket, with the pump at the end of the swing in the tensioning arc.  That is to say, this is the position of the pump with it's belt as tight as it can be made.  To help visualize, the lower leftmost holes are those that correspond with the bosses on the water pump.


With the pump in this position, the aluminum inner bracket won't clear the exhaust runner for cylinder 1.  This looks like it'll be simple enough to fix by cutting a new bracket from 1/8" sheet, extending the leftmost hole out by another 1/2-3/4".  This will pivot the pump away from the exhaust runner enough to keep them from fighting over the same spot.  I'm sure I'll be proven wrong, though we'll see when we get there tomorrow.

There was an unforeseen issue of clearance involving the power steering pump belt's idler pulley bracket and the head.  In short, I had to cut and grind the hell out of it to fit.  I also had to move the temperature sender from the thermostat housing to an open port on the driver's side of the block, previously occupied by a CTO switch.  

Since I'm a cheapass and wanted to use the sender that was originally installed in the 258's head, I needed a brass reducer fitting to step up to the size of the block's port.  In order to make sure that the sender was directly in contact with the coolant, I had to drill out about half of the reducer's inner mass.  If memory serves, the reducer was a 3/8 to 1/4 NPT,  though I wasn't sharp enough to write it down.  If it helps, I believe the stock temp sensor (that fits in the thermostat housing) is of the same size/thread pitch of the OD threads.

All of these fitment issues, barring the PS pump, were painstakingly discovered through an iterative process that spanned about 6 hours.  That's 6 hours of, "Damn. This part's in the way.  Better grind it", followed by, "Sonofabitch! Now that's in the way.  Time for the band saw", which made way for, "Fuck! Now I have to unscrew that thing that I used red loctite on a few days ago and I left the torch at the house!", and so on.  While I get that these things are business as usual for this kind of work, I'm looking forward to close of business so I can drive the hell out of here.  

Feels like I never left

Okay, so first thing's first: that recipe from the last post?  Totally useless.  500°F is plenty hot to make you uncomfortable and to burn the hell out of your hands and forearms, but not hot enough to adequately heat this aluminum intake to allow you to braze a base plate on.  I have no reason to believe that you couldn't make it happen with a propane grill, but I don't have a grill or sufficient patience to go find and use one.

That said, I also owe a semi-apology to Dorman.  Turns out that they were only half to-blame for the fitment issues.  After getting the OEM intake in place, the header still didn't fit, but not quite as badly.  Rest assured, it was still a show stopper.

For the sake of time, I grabbed an old header from a '96 Jeep with the intent of chopping it up and modifying it to provide a  temporary solution for a proper dual exhaust.  This was taking too long to get completed, and the stop gaps and crack welding started to pile up quickly.  In the interest of time, once again, I got another
header that was well-reviewed and had no reports of fitment issues.  To make things better, it was even specifically described as being an exact replacement for the factory exhaust manifolds for '00-'06 4.0l Jeeps.

If you think it fit, you haven't been reading this log for very long.

As soon as I discovered that this header didn't fit, I started to think of what measure of cutting, grinding, and spitting on the intake would be needed to get it in place.  Once it occurred to me that this would cost who knows how much time (as well as the $200 for the falsely-advertised and poorly-made header) with no guarantee of success, I checked online to see if anyone might have a set of factory manifolds for sale.  I'd be lying if I said that my decision wasn't also made out of spite; I was determined to find another solution so I could return the damn header and keep my money out of the pockets of the jerks that sold it to me.

Against odds, I not only found the manifolds for sale, but the guy was available to sell them today.  Once we met, I gave him the rundown of my header trials, and he nodded as though it was something he was more than slightly familiar with.

"They don't fit," he said, "And if you did manage to get them on, they'd be starting to come off within a couple hundred miles."

This was a possibility I hadn't even considered.  While it's possible that the guy was trying to cement a sale, he already had my money and showed himself to be more trustworthy than whoever sold me the aftermarket crap.

So 2 hours later, I found myself manifolded and ready to get this long embarrassment over with.  I went straight back to the shop, wirebrushed the rust off the mating surfaces, and started to get my exhaust on.


They didn't fit.


I'm kidding.  They fit perfectly, as expected!


That's not to say that everyone lived happily ever after.  No sir, there's still plenty of pain to be shared, you can be sure of that.

Friday, December 8, 2017

If you're going to redo something, redo it right.

I've risen from the space between phlegm and fever to share a holiday recipe and a wish.  First, the wish:

There's a certain Swedish goat that has been standing unburnt for too long this year.  My wish is that the Gävle Goat hurries up and burns down.  The longer it remains uncharred, the more nervous I become.

Now, the recipe:

Milled and Brazed Intake
Serves: 6 cylinders

INGREDIENTS:


  • 1 OEM 242 intake manifold, years '99-04
  • 1 carburetor base or adapter plate (for our purposes, we are using the adapter plate for a Weber 38 DGES to a 258 intake manifold.  Use a plate that suits your dietary preference)
  • 6 1/2" dia. aluminum plugs
  • 1 bigass mill (incl. preferred double-fluted endmill)
  • 1 badass die grinder (incl. mandrel and cutoff wheels)
  • Several bottles degreaser (we used LA's Totally Awesome, but feel free to use your preferred, aluminum-safe, cleaning sauce)
  • 1 can oven cleaner (for color, optional)
  • Aluminum brazing rods
  • Stainless steel brush
  • MAPP torch

PREPARATION:

Douse the manifold in degreaser, scrub-a-dub, rinse clean, and dry.

Spend as much time as necessary figuring out how to barely clamp the intake into your bigass mill.


Maintain control of your waste elimination ports as the endmill grabs the manifold, causing it to jump out of the clamps and becomes well-shaken.

Check for unexpected cracks, noting any that are found so that they may be brazed shut later.

Once the manifold is confirmed to be well-secured and no longer moving, mill away the throttle body mounting base and any other material that would obstruct a centered placement of your adapter plate.

Set up your badass grinder with cutoff wheels to remove any remaining material used for the threaded holes originally placed for mounting the throttle body.


When using your grinder, make sure to follow all manufacturer-provided safety directions, such as the following which accompanied the cutoff wheels:


These glyphs clearly instruct the viewer to wear x-ray specs while listening to boss tunes (image 1), and to manually-operate the tool while catching up on your reading (image 2).

Tear it up with your grinder.  You should be left with something that looks like this.


Dress the manifold with adapter plate and injector port plugs, like so:


Place the manifold in your oven and begin heating to 500°F.  It's important to begin heating the oven with the manifold already inside, as this will ensure all material comes up to temp uniformly.

Fan smoke out of the kitchen through whichever door or window is closest while oven works to reach set temperature.

Vent smoke from oven once appropriate temperature has been reached, silence smoke alarms as needed (removing them from their mounting fixtures and storing them in the freezer is a great method, though remember to put them back later if safety is of any concern), then brush seams to be brazed with the clean stainless steel brush before using the MAPP torch to heat surfaces for brazing rods.

Braze to taste.

Continue fanning out smoke.


Monday, December 4, 2017

I'd header that way, but the intake Dorman won't give me clearance.

Or, "Manufactured to meet OEM specifications!"

May not be the best titles, but it was either that or a string of profanity.  Check it out:


In case the trouble isn't clearly communicated by the images, what's happening here is a lack of clearance between the header and the underside of the manifold.  To make matters worse, the flange thickness of the manifold is a fair degree beyond that of the header flange.  Basically, shit's all fucked.

See, the manifold I used was a Dorman replacement, and while it technically acts as a replacement, they took too many liberties in their design to allow fitment with this particular header (which I'll admit is a tad out of the dimensions of the factory exhaust, but is nowhere near as wonky as the intake).  This isn't the first time Dorman and I have butted heads, as I've found they have a tendency to stack deviations from OE designs to the point of a lot of their products being inadequate for non-stock or aged vehicles.  That could just be me, though.

Luckily, my compulsion to acquire more parts than most people would think are necessary and then horde them for long after it would seem I've got any use for them saved my ass.  Again.  I happened to have the Chrysler intake (though will be removing the logo) that matches the head perfectly and a test fit indicated that it'll do the job, no questions asked.

While the downside is all of the work to the first manifold going to waste, the aluminum lining is that the second attempt will give me the opportunity to do the modifications right, instead of with JB Weld.  I'll be honest: I would shudder at the thought of my epoxy slop job being seen by the folks at the exhaust shop when I take the Gremlin in soon. 

Once the OE manifold is done in the degreaser bath(tub) and I eat a pizza, I'll be going to the Chinesium import depot and picking up a pack of aluminum brazing rods.  From there I'll be heading to my friend's house to use his mill and grill.  We'll see if this route leads to success or shame. . .